
Hi everyone,
I finally sat down to put the tutorial together for these cute little houses. I am so in love with them that I can literally make these all day long! Maybe that’s what I’ll do this evening!
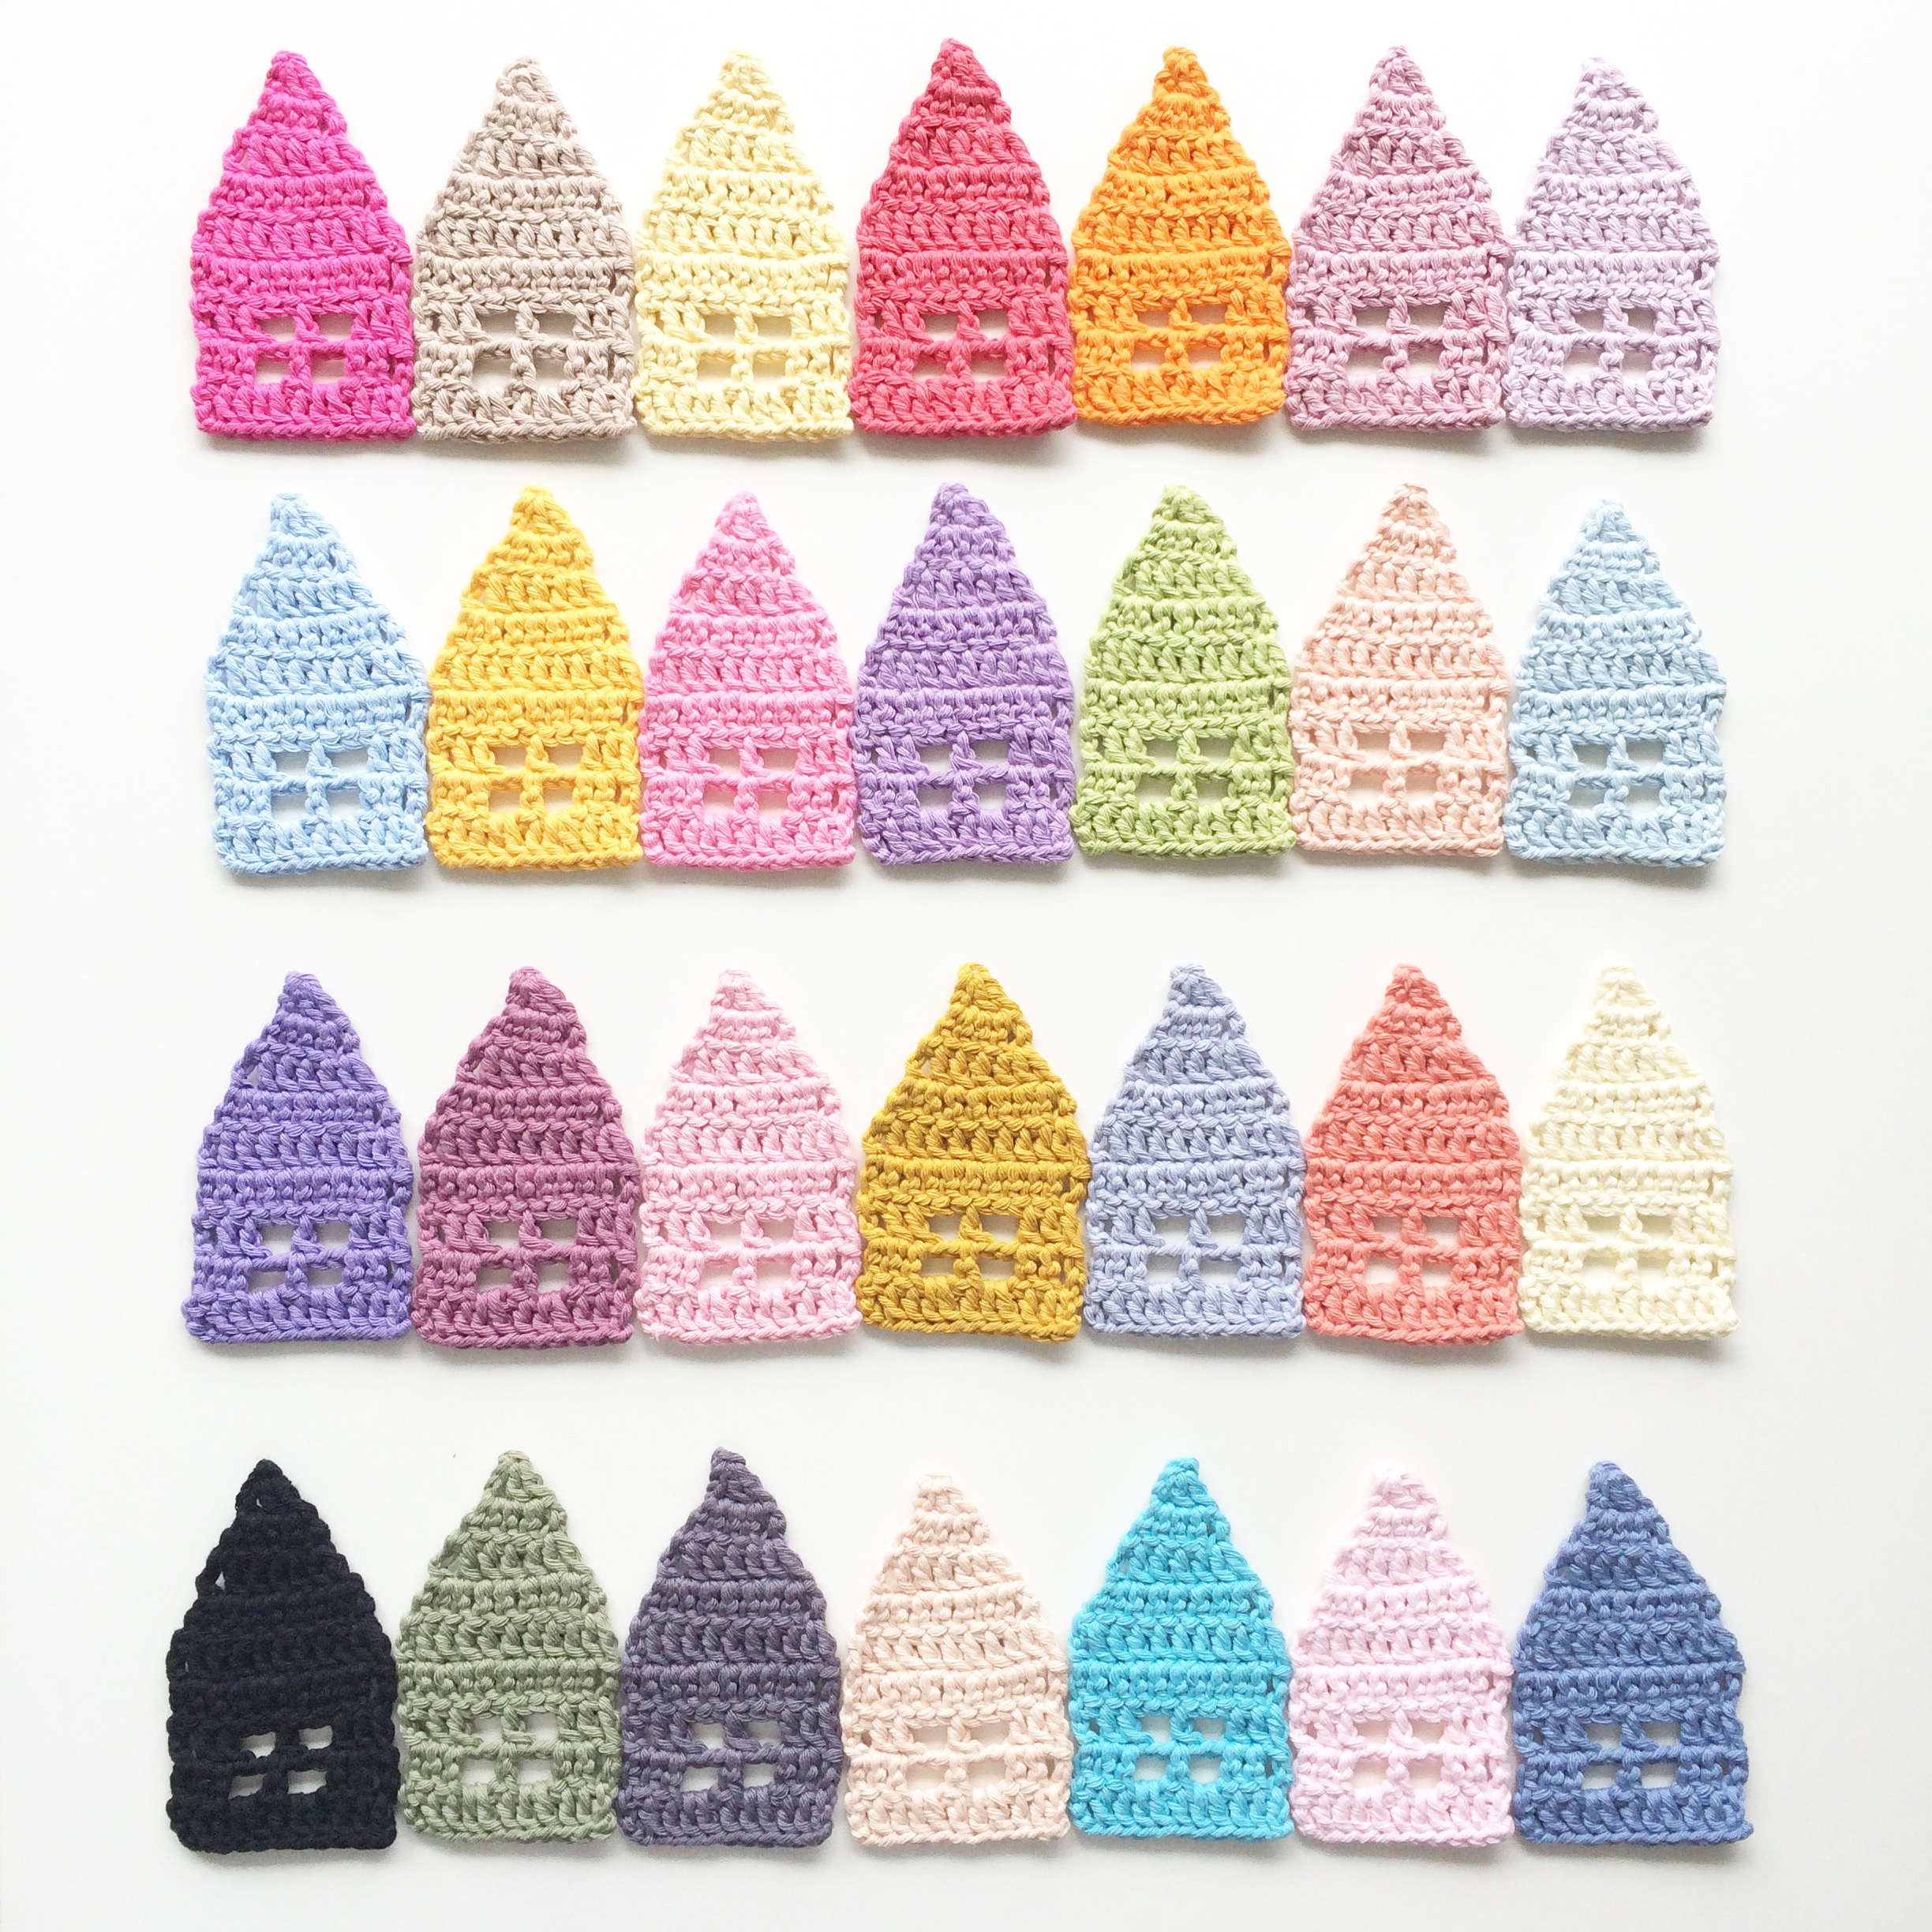
Little Crochet houses
I saw this cute little bunting on Pinterest a few months back and knew right away I had to give these a try. So out came some yarn & a hook and after a few trials and errors, I finally settled on a pattern I was happy with.
Little crochet houses
Now these are made top down so they will appear to be upside down in the pictures below, but worry not! Once we done with them, a quick flip and they will be ready to move in!
Materials
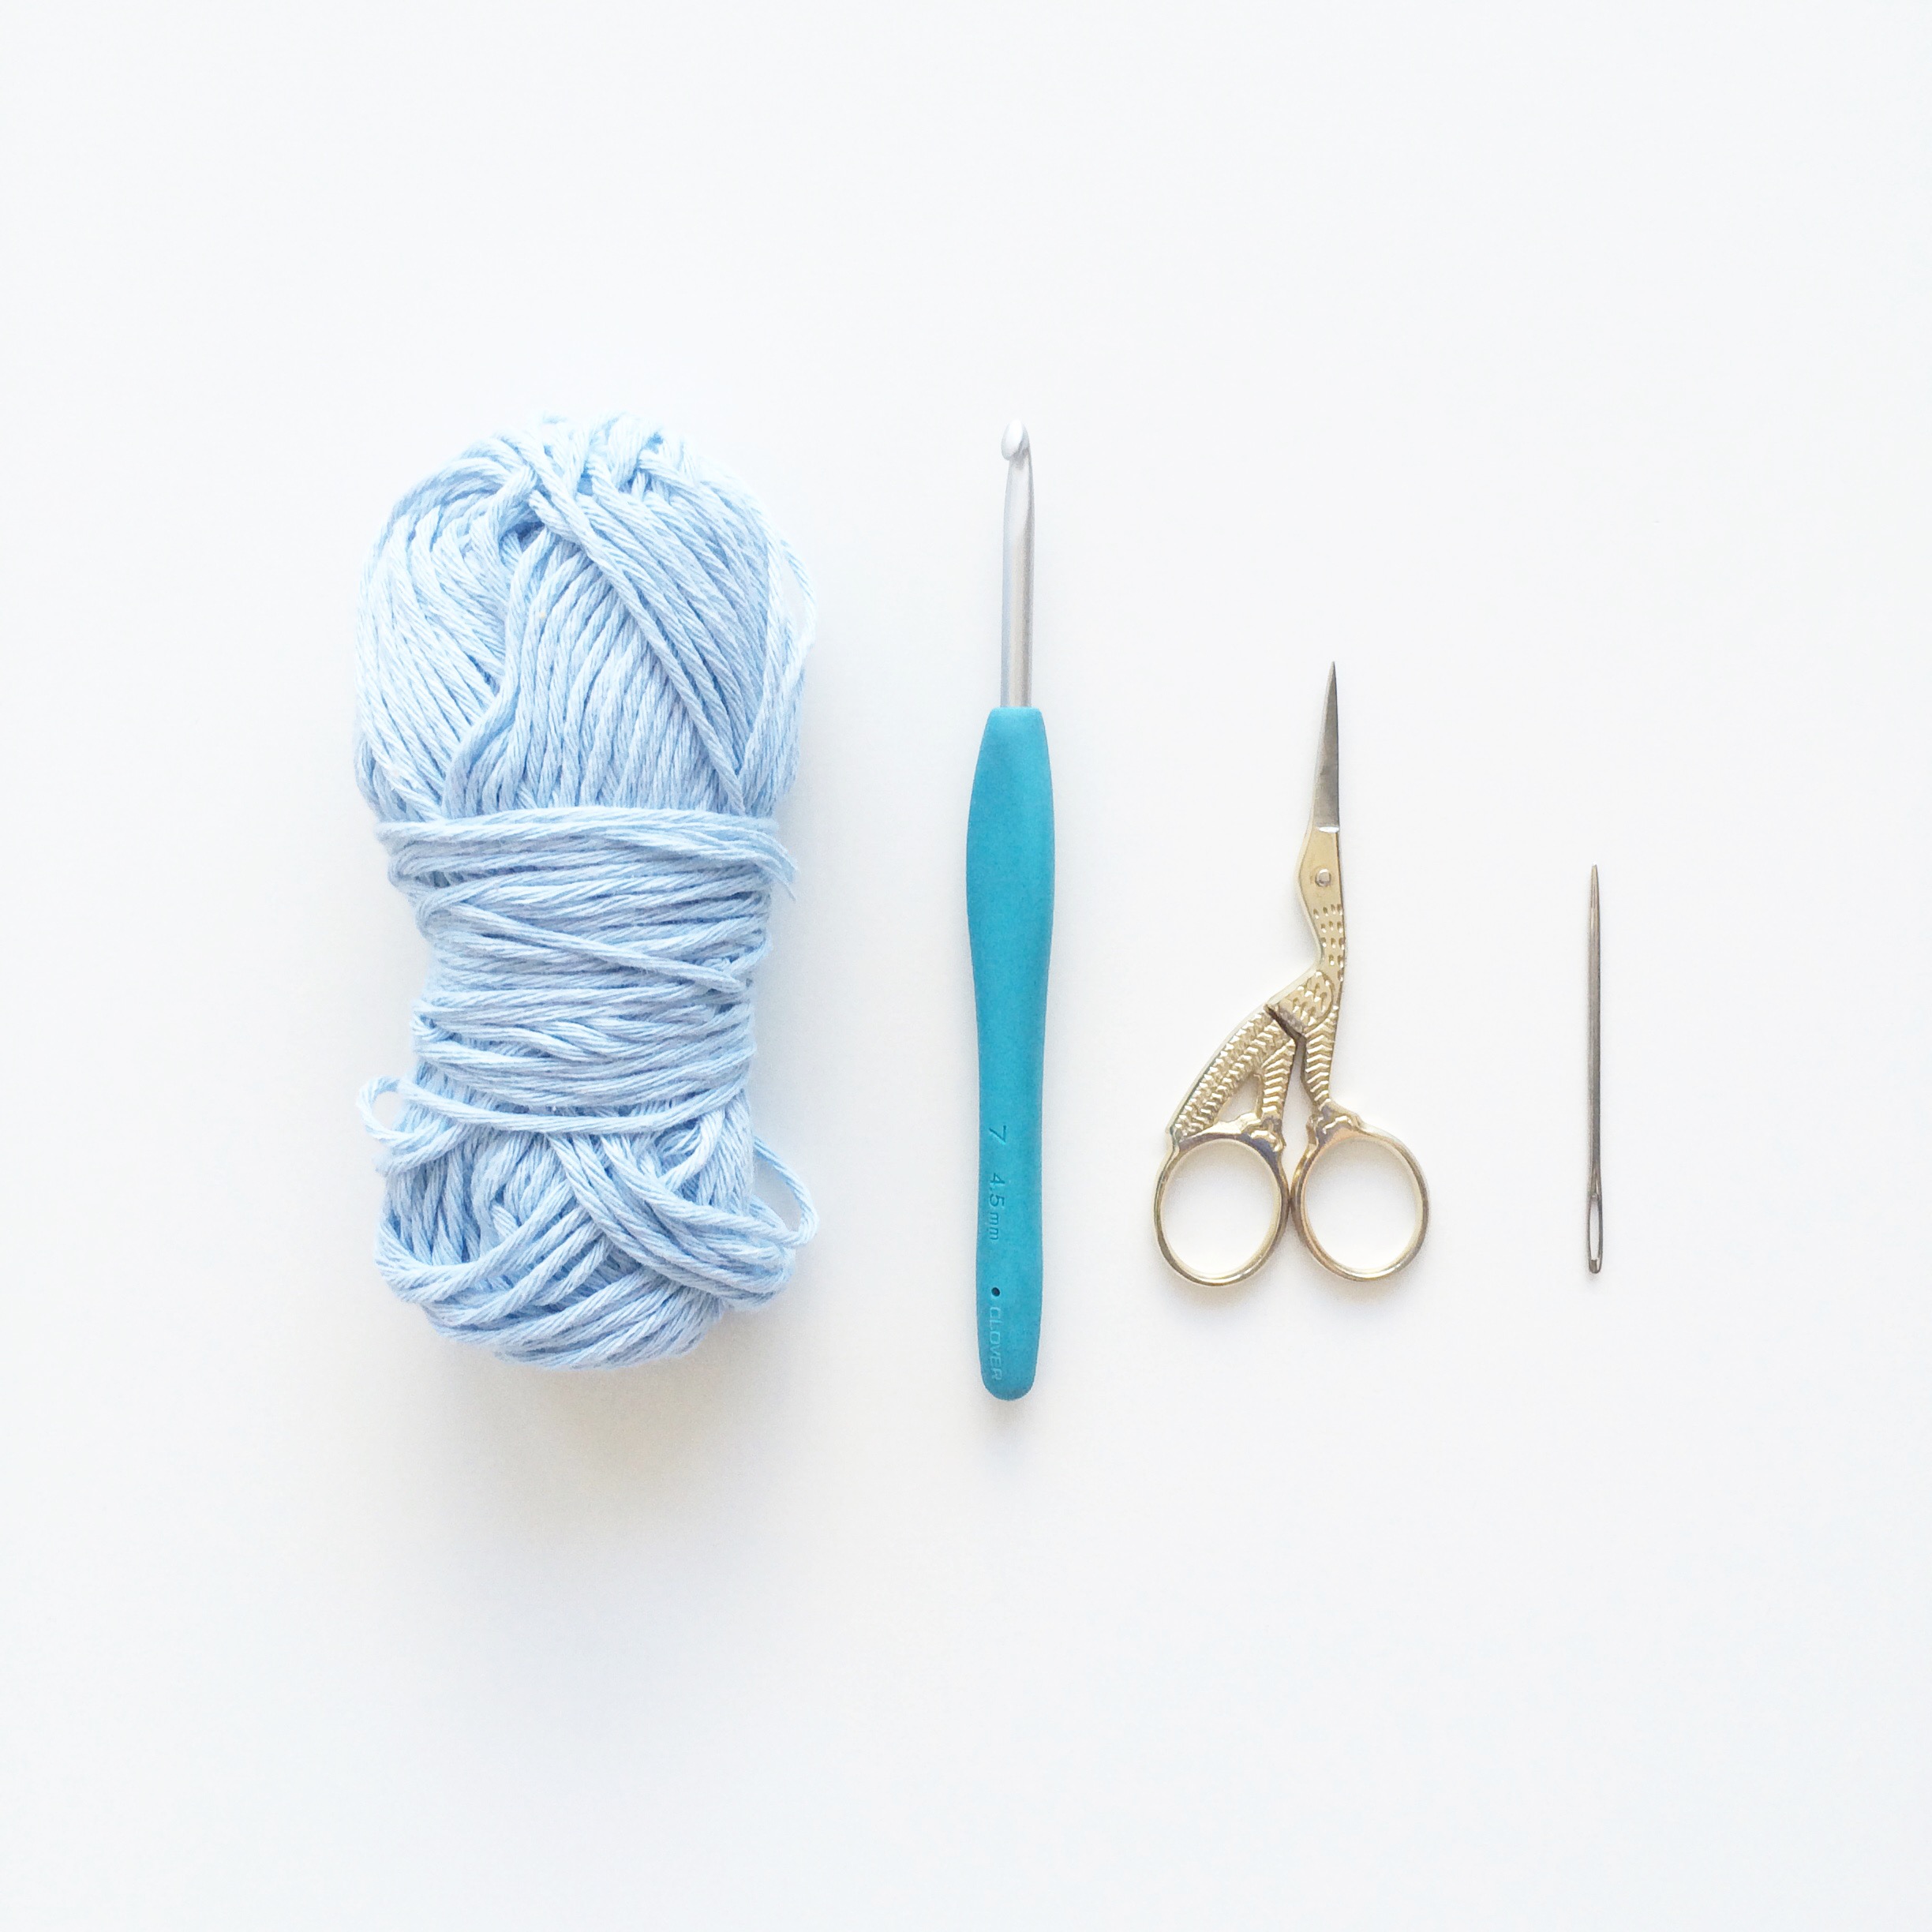
Materials needed
Any yarn and a one hook size smaller than the recommended size. (I have used an Aran cotton yarn with a 4.5mm hook for the tutorial below)
A darning Needle
A pair of scissors
US Abbreviations
st – stitch
sl st – slip stitch
ch- chain
ch-sp – chain space
dc – double crochet
Pattern & Tutorial
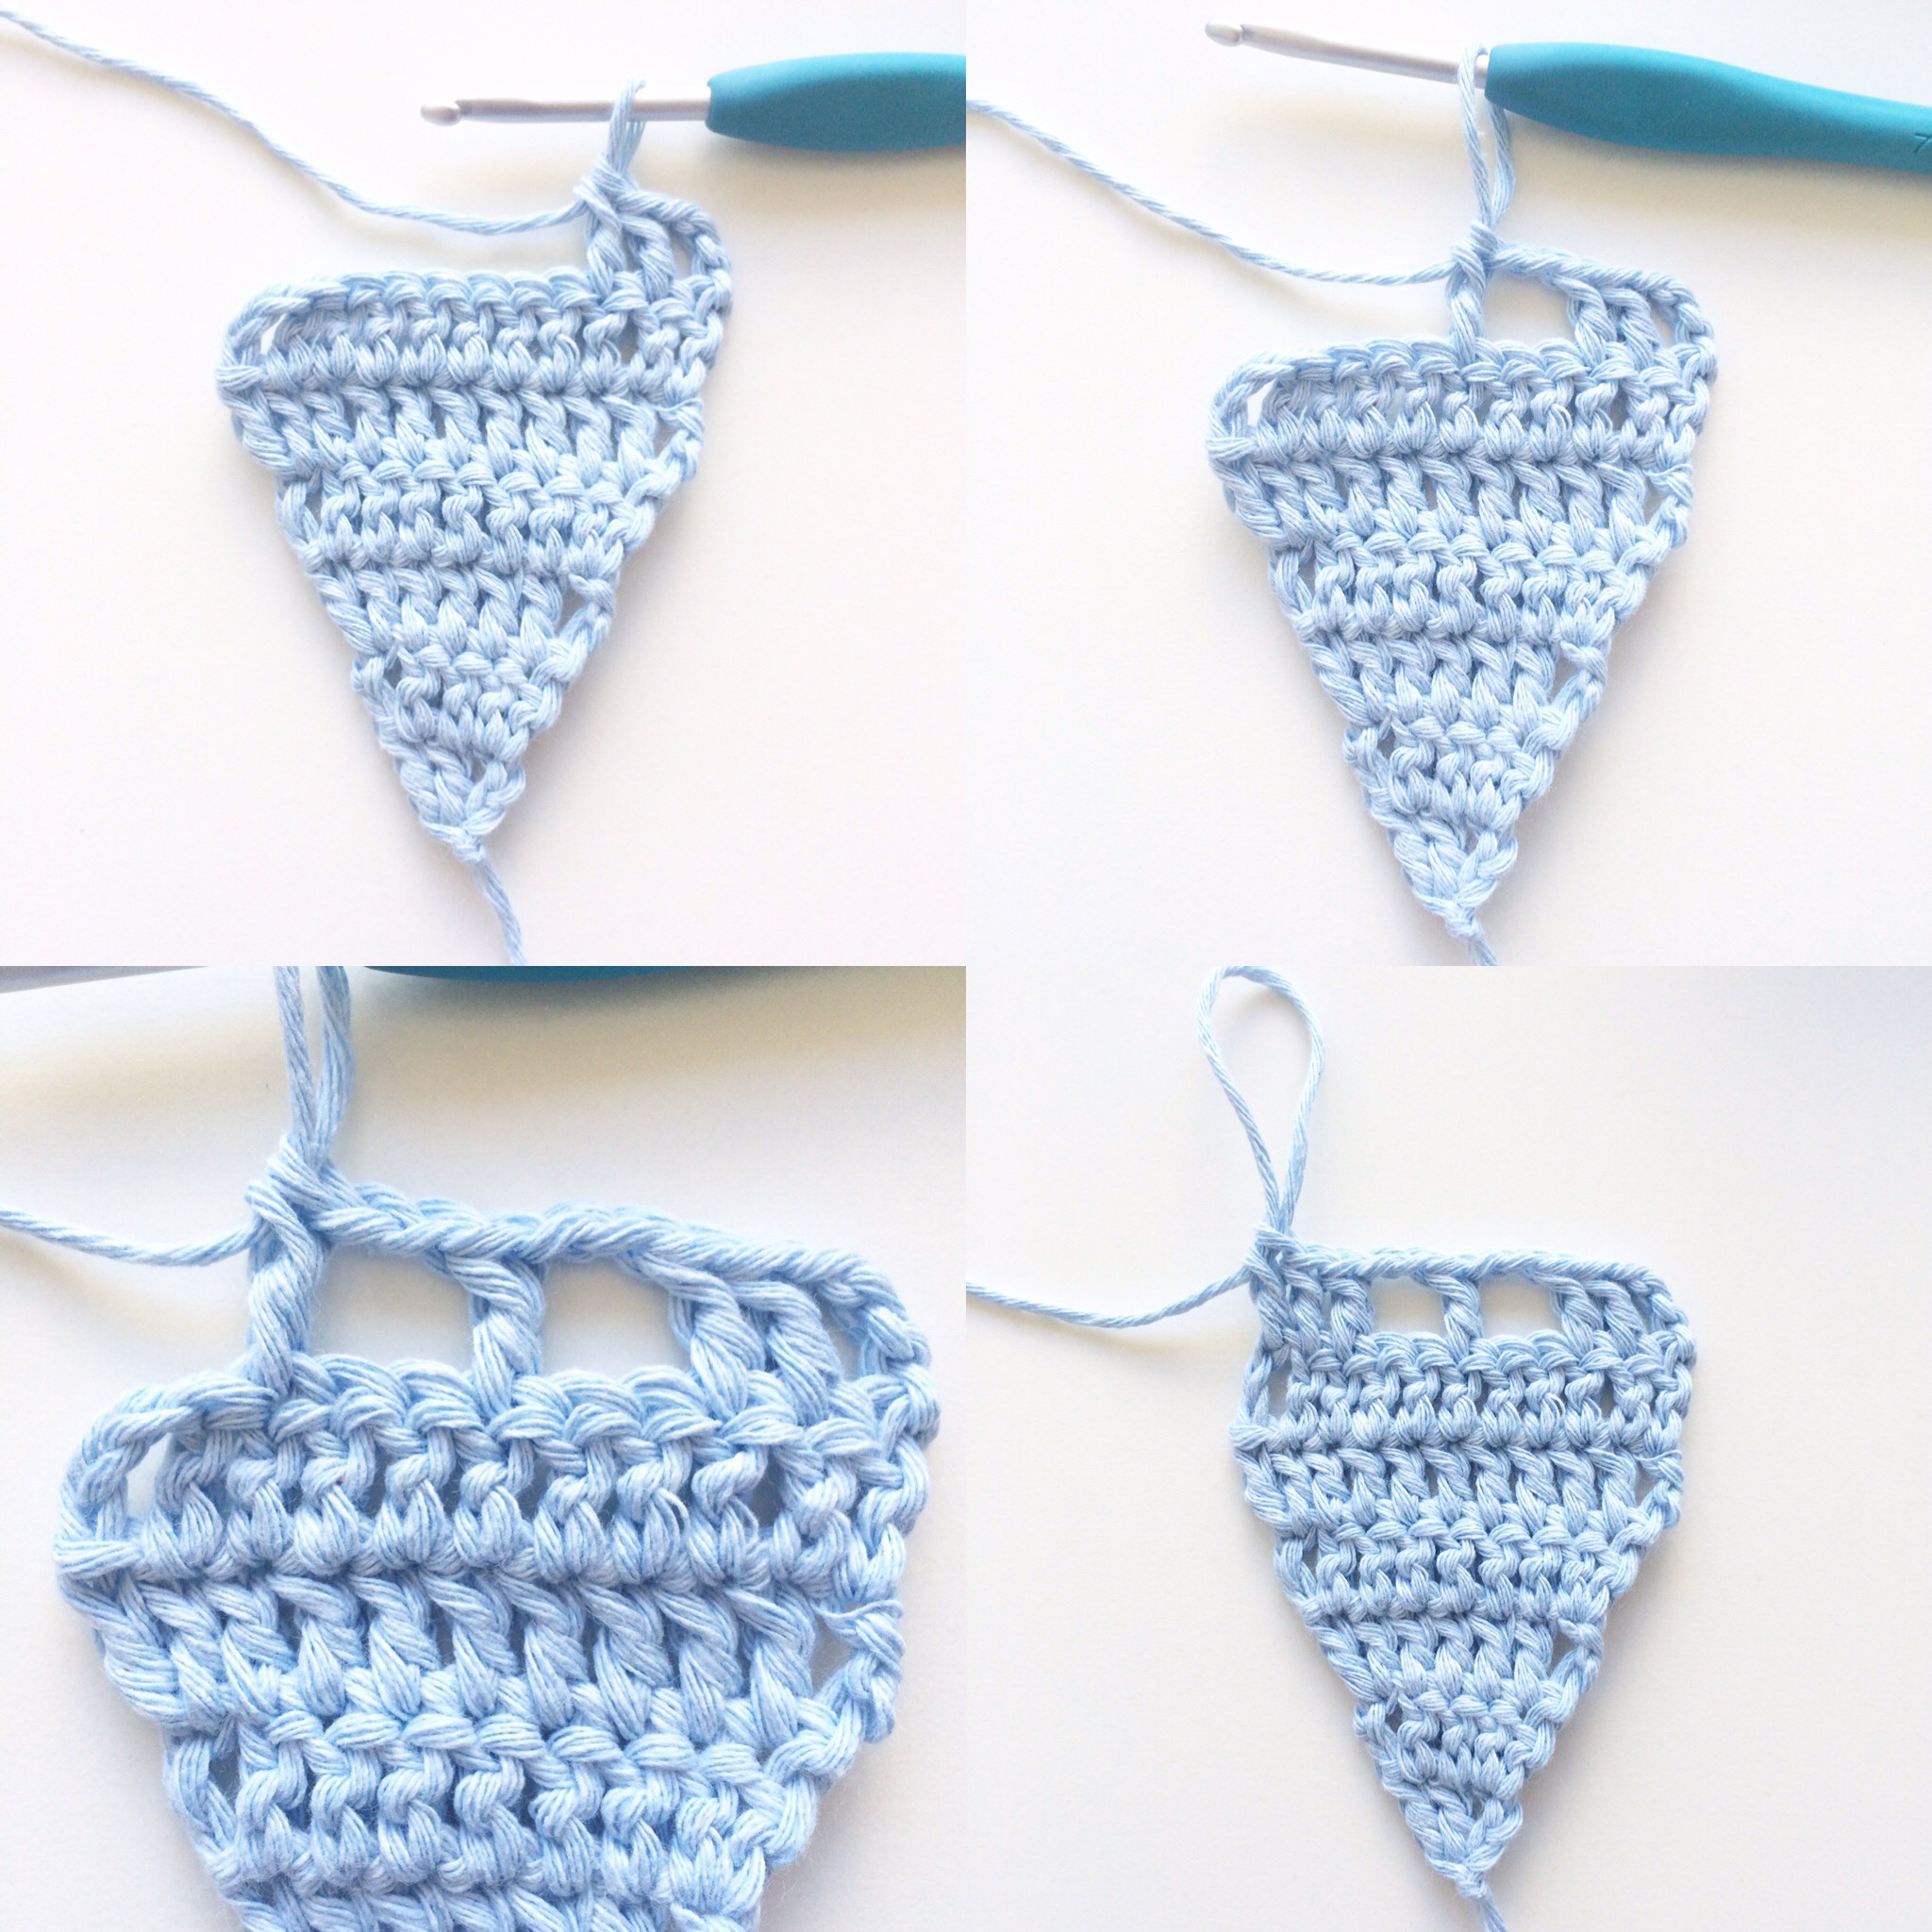
Round 1
Make a slip knot. Ch 4 and make 2 dc’s in the 4th ch from the hook. (Total 3 dc’s)
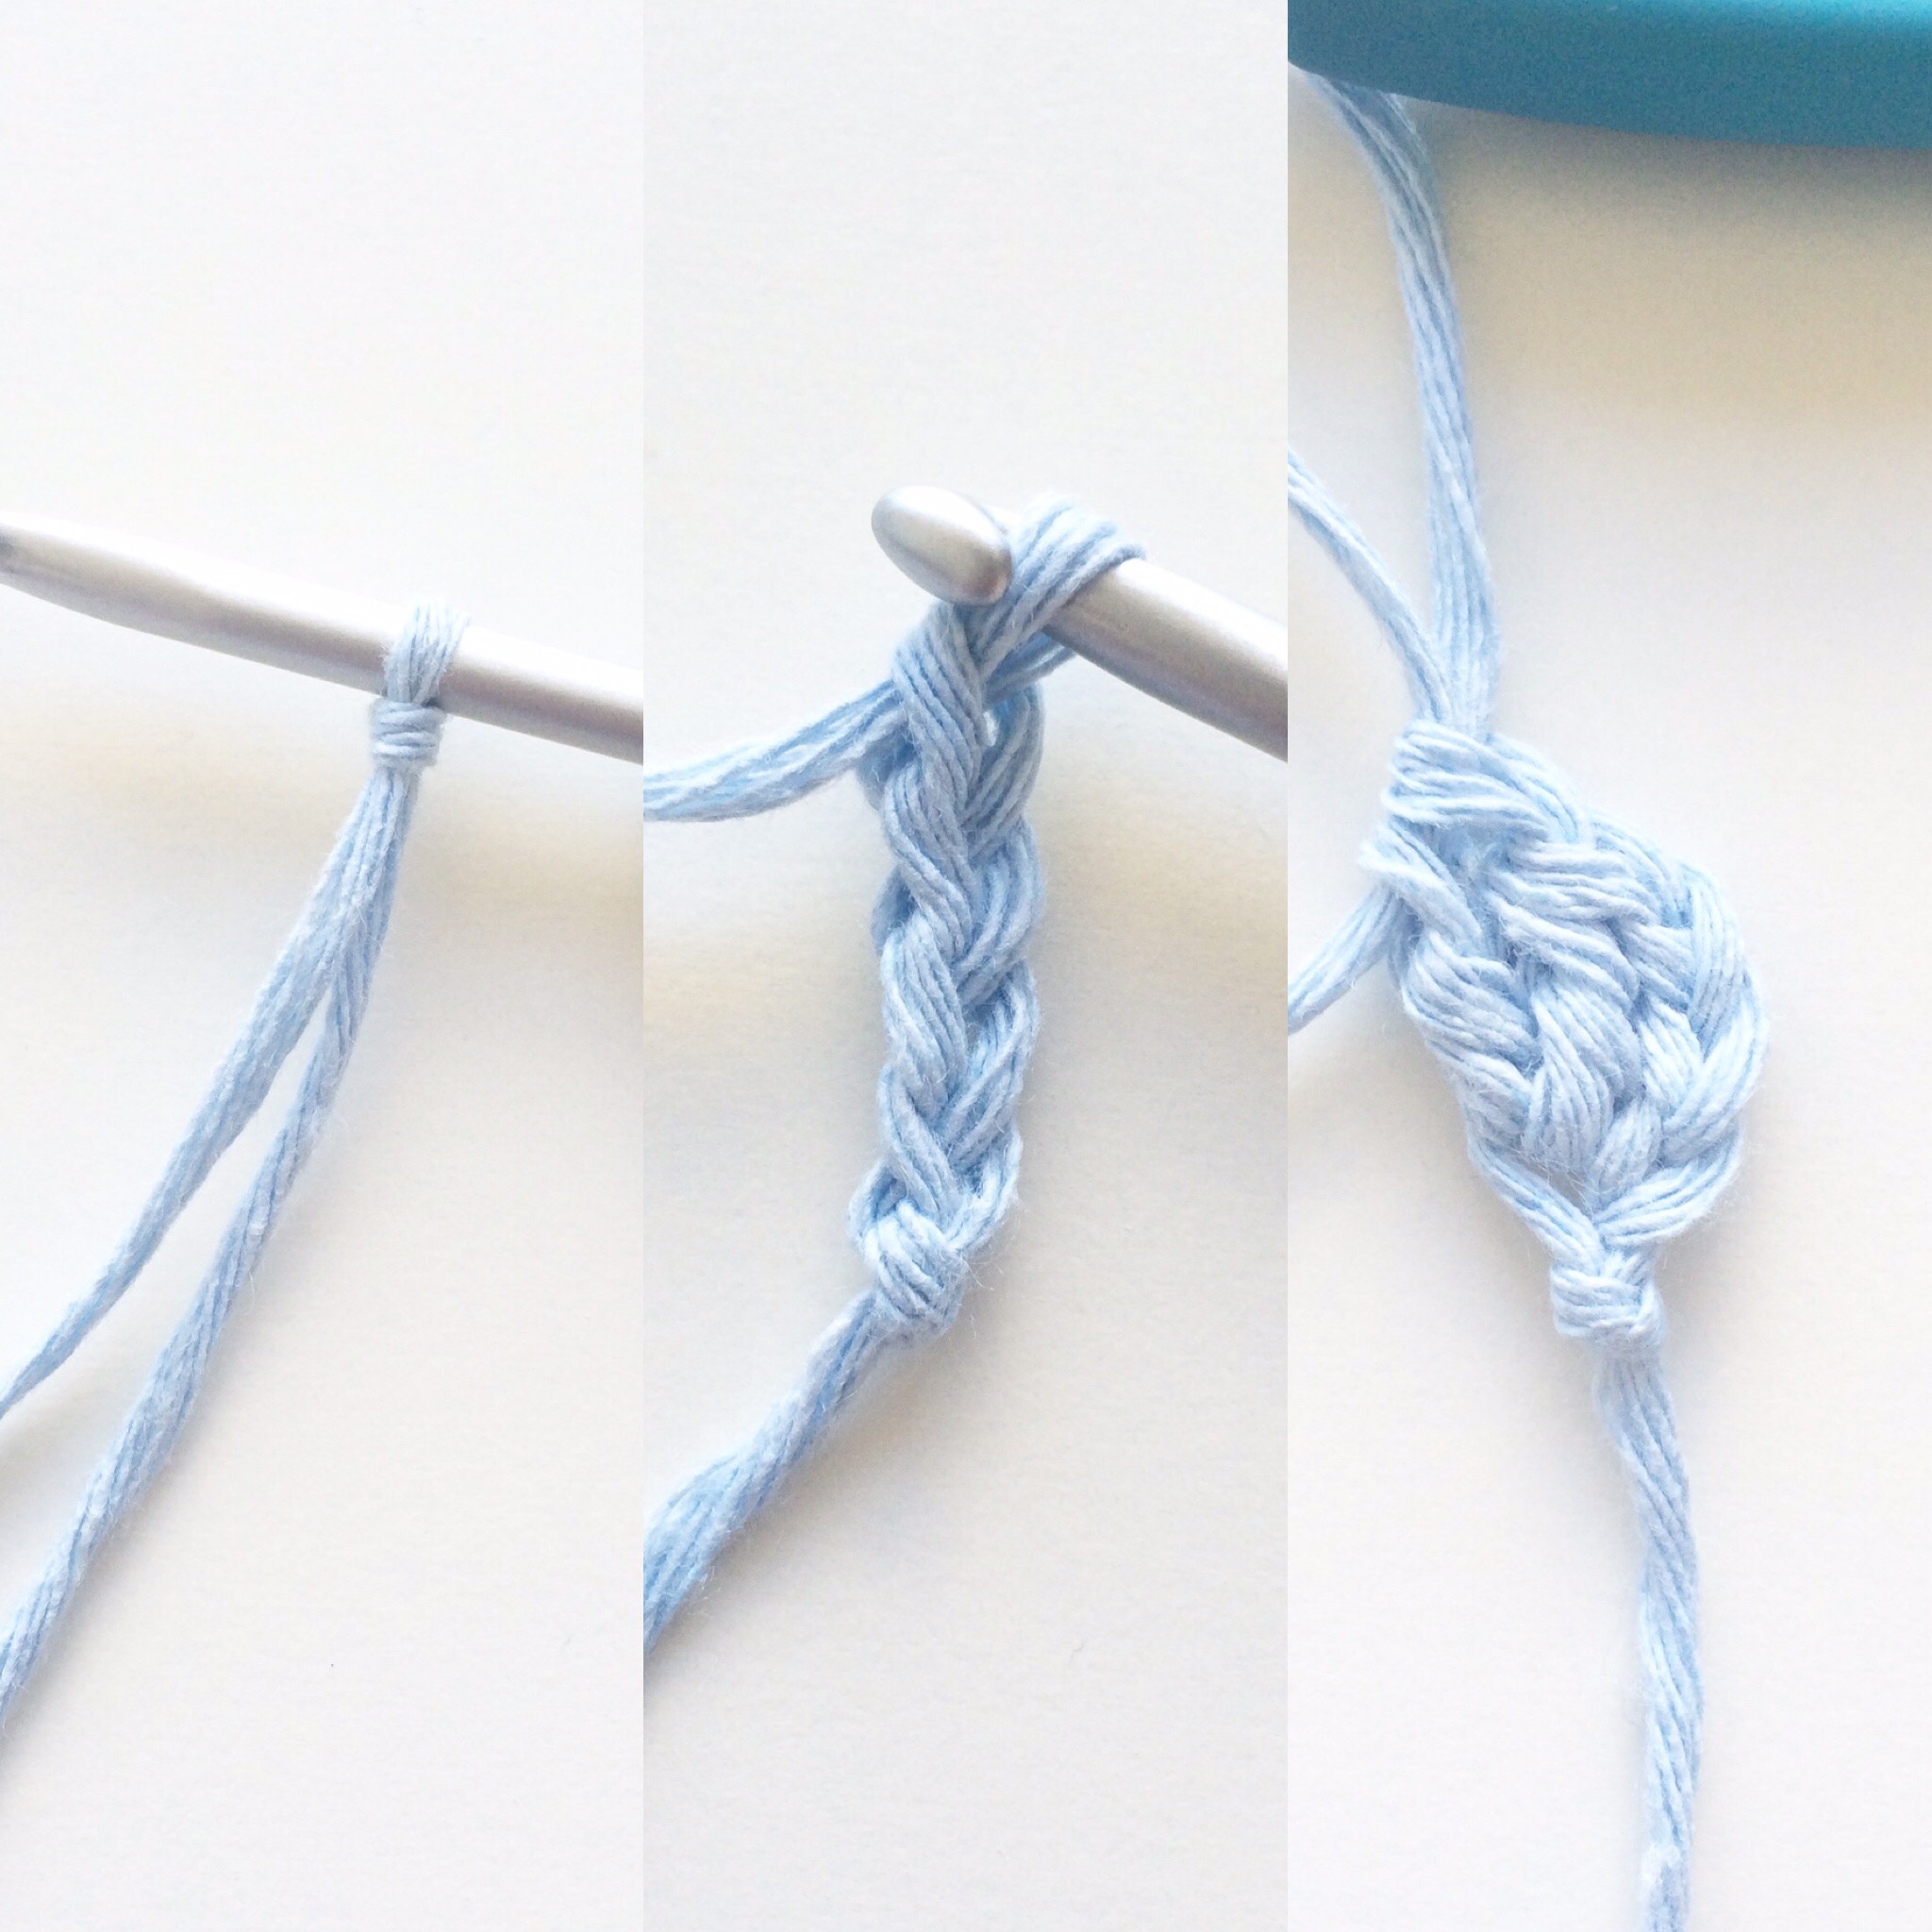
Round 1
Round 2
Turn work and ch 3 (this ch 3 will be counted as 1 dc in all rounds). Make 1 dc in the same stitch, 1 dc in the next stitch and 2 dc’s in the last stitch. (Total 5 dc’s)
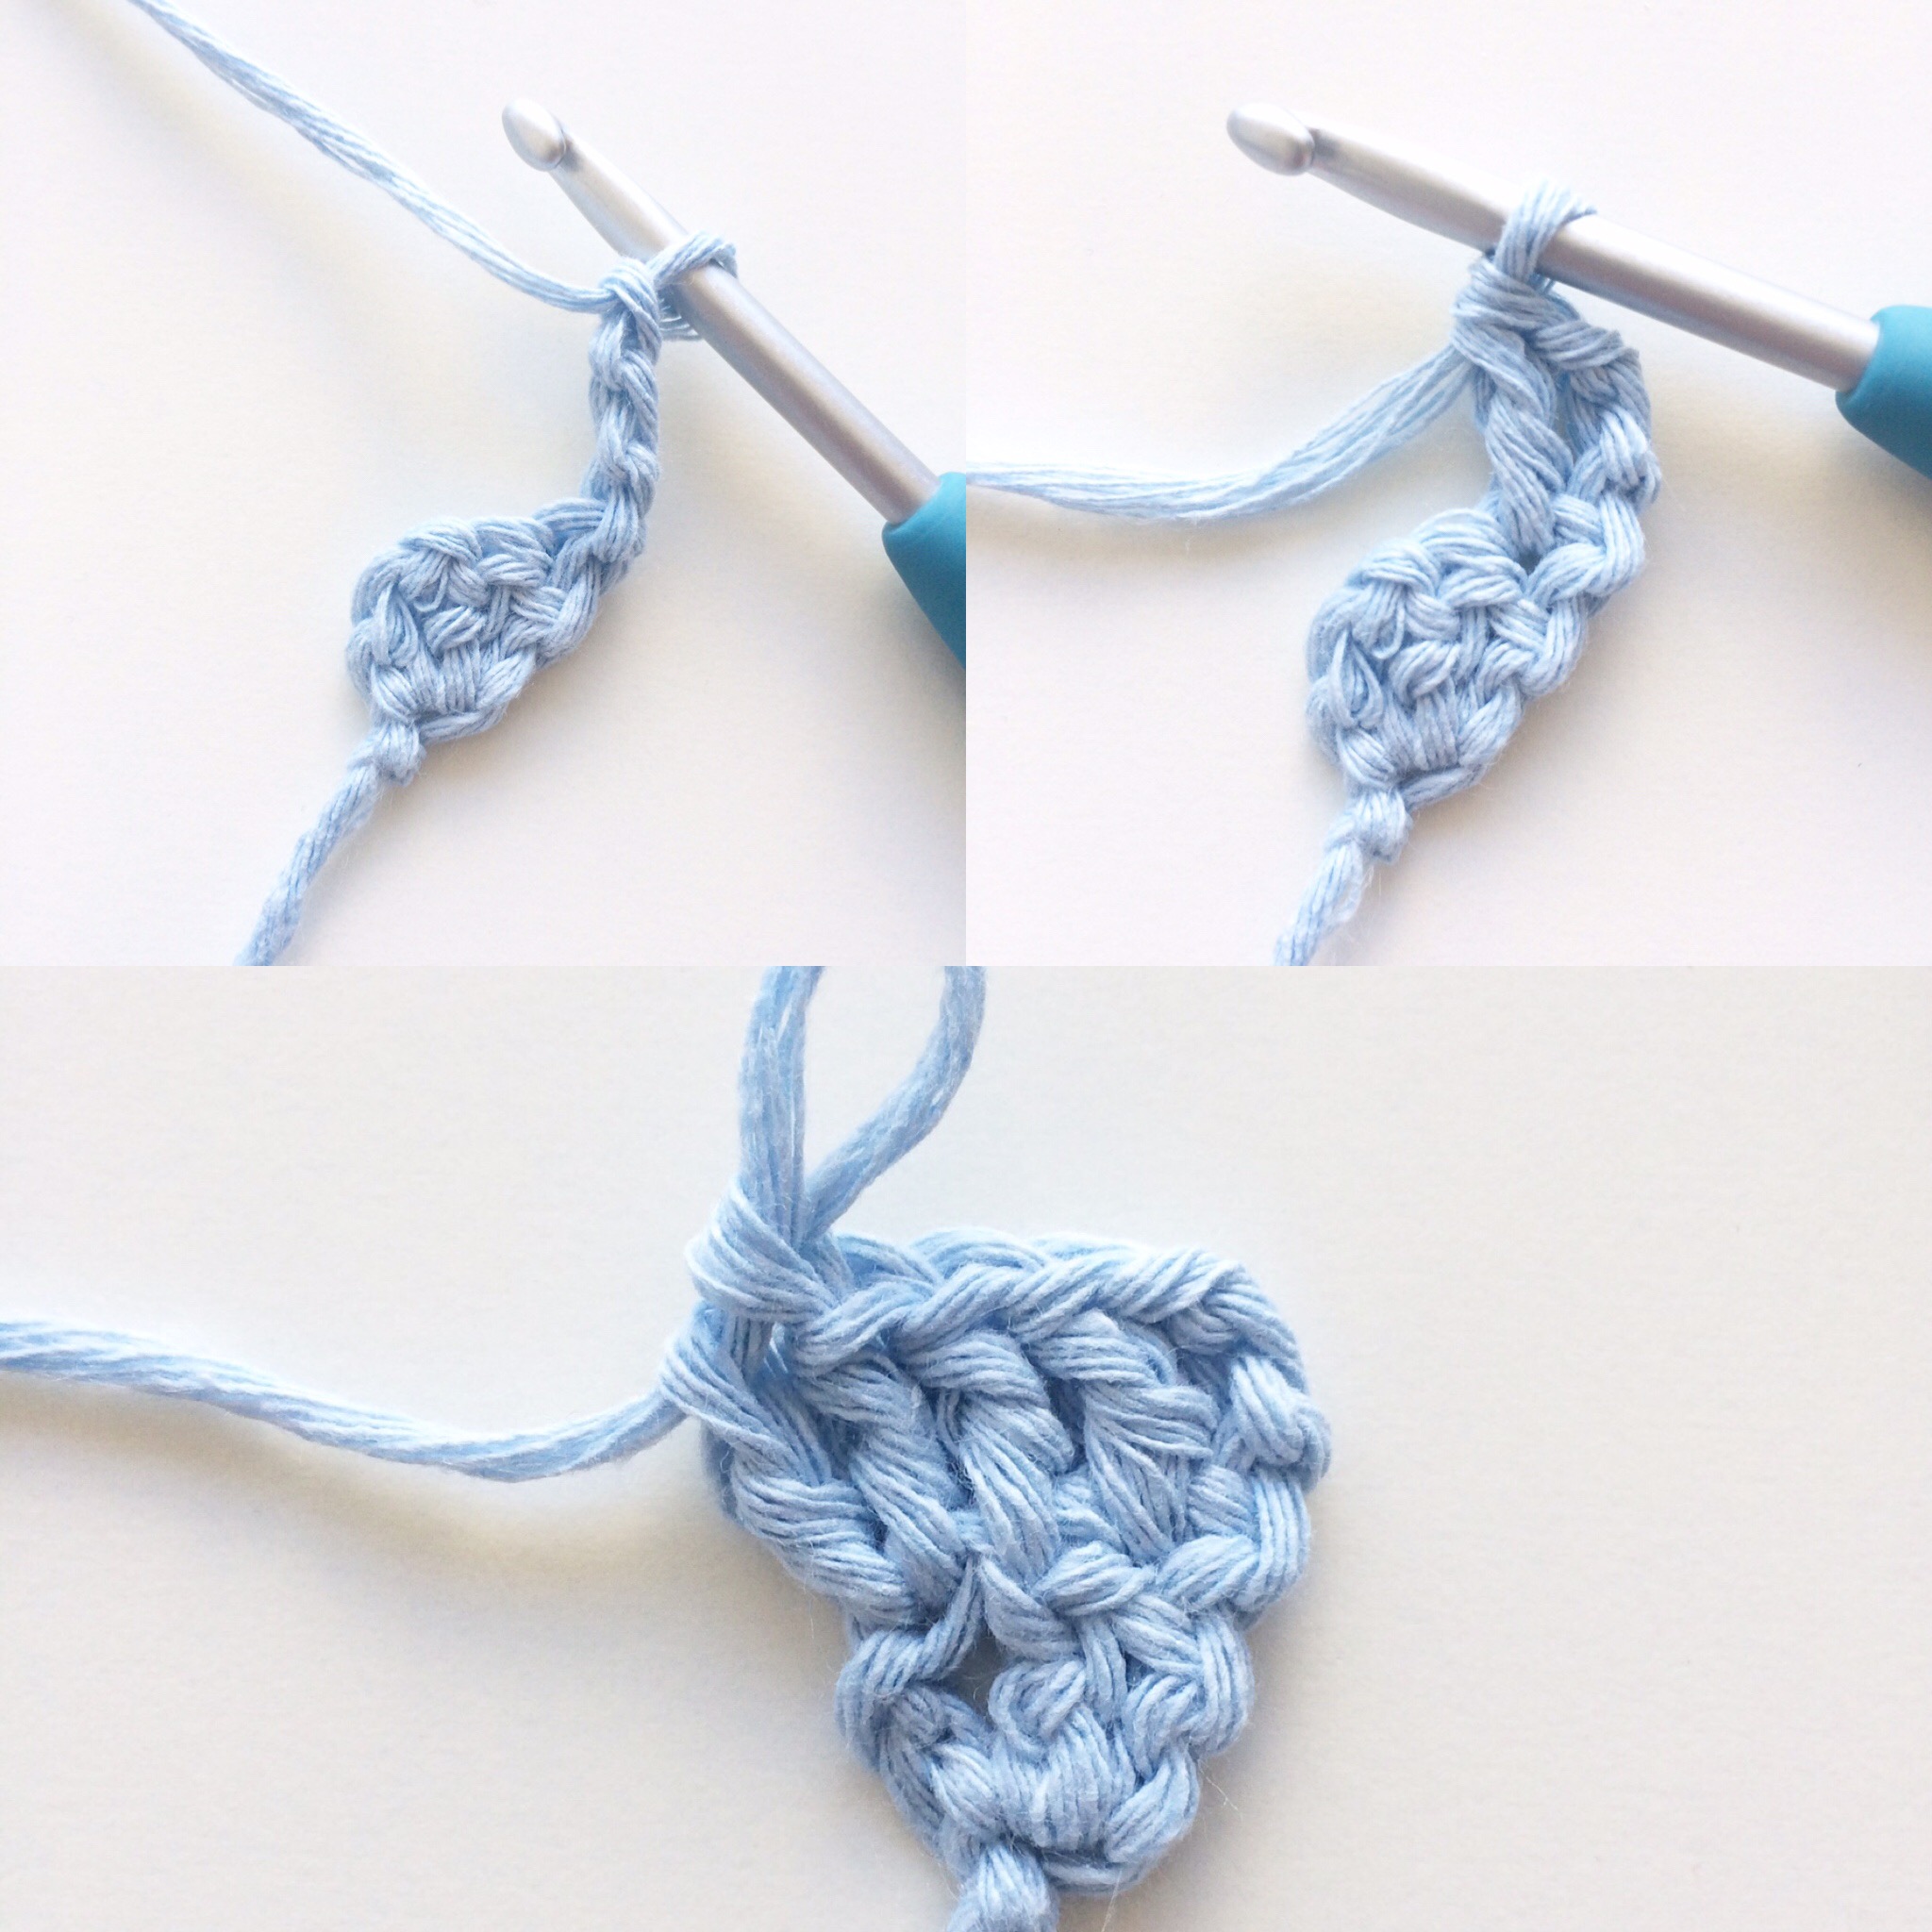
Round 2
Round 3
Turn work and ch 3. Make 1 dc in the same stitch, 1 dc in the next 3 sts and then 2 dc’s in the last st. (Total 7 dc’s)

Round 3
Round 4
Turn work and ch 3. Make 1 dc in the same st, 1 dc in the next 5 sts and then 2 dc’s in the last stitch. (Total 9 dc’s)
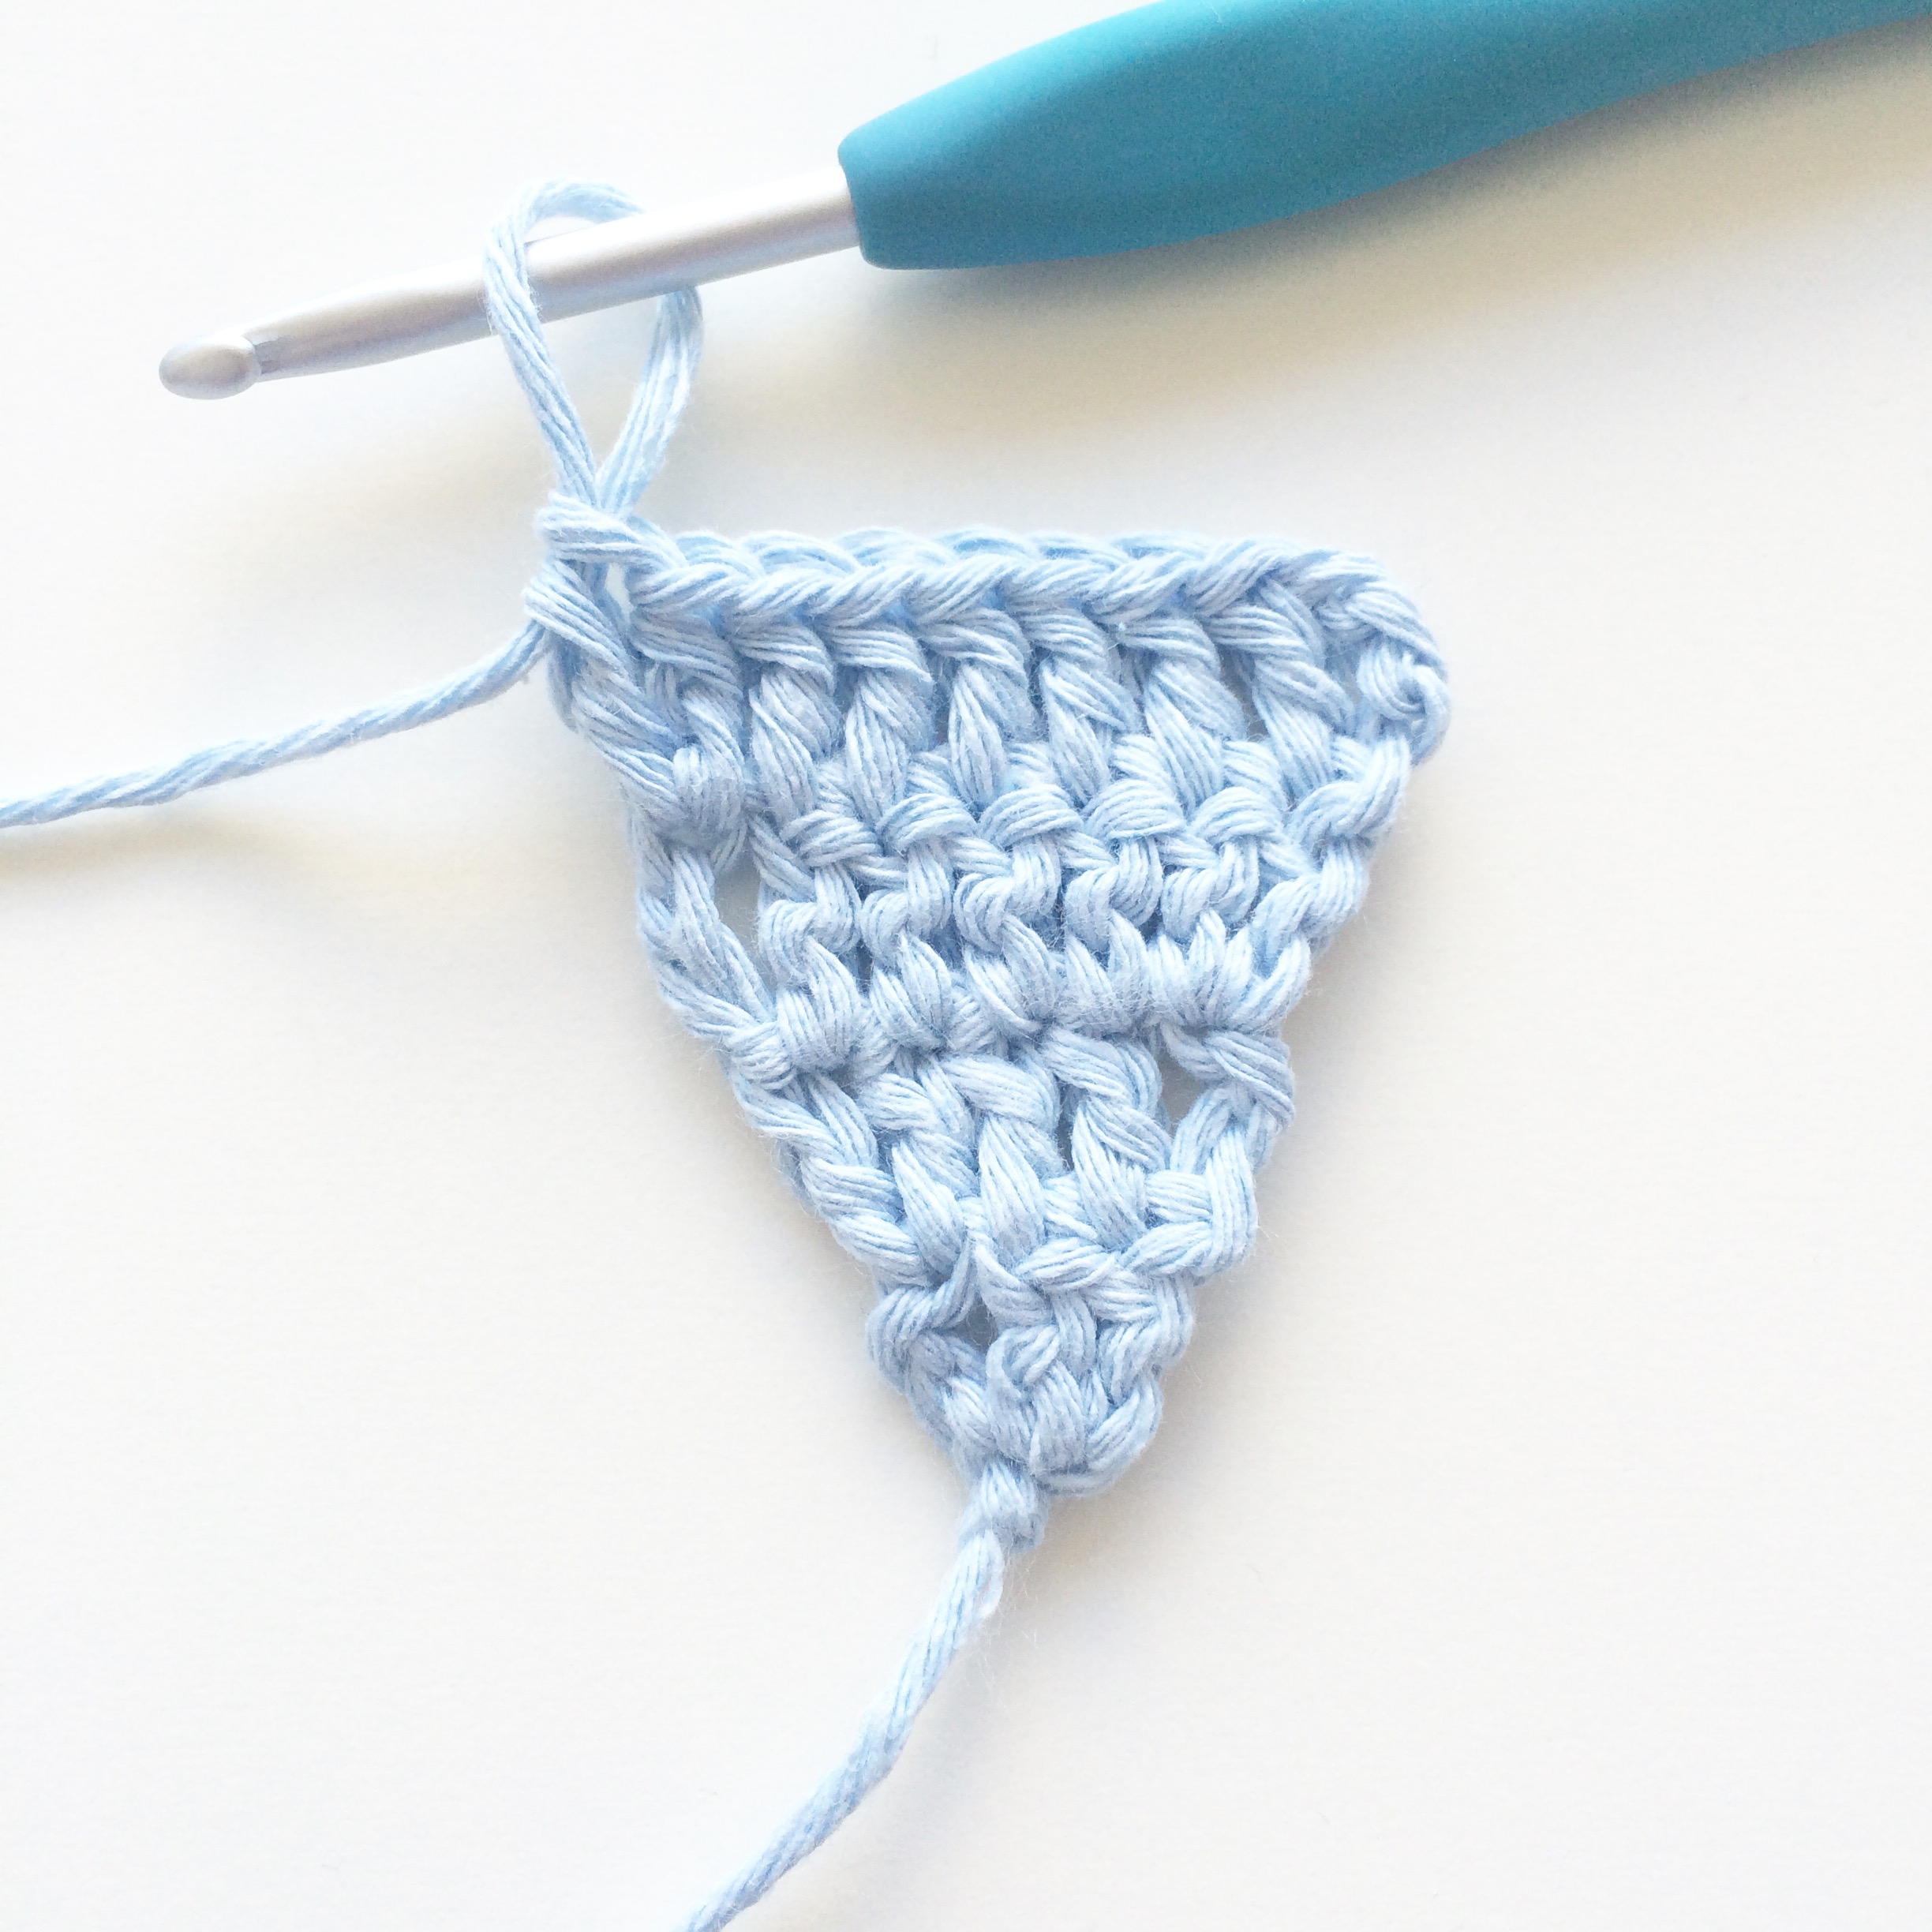
Round 4
Round 5
Turn work and ch 3. Make 1 dc in the same st, 1 dc in the next 7 sts and then 2 dc’s in the last stitch. (Total 11 dc’s)
Round 5
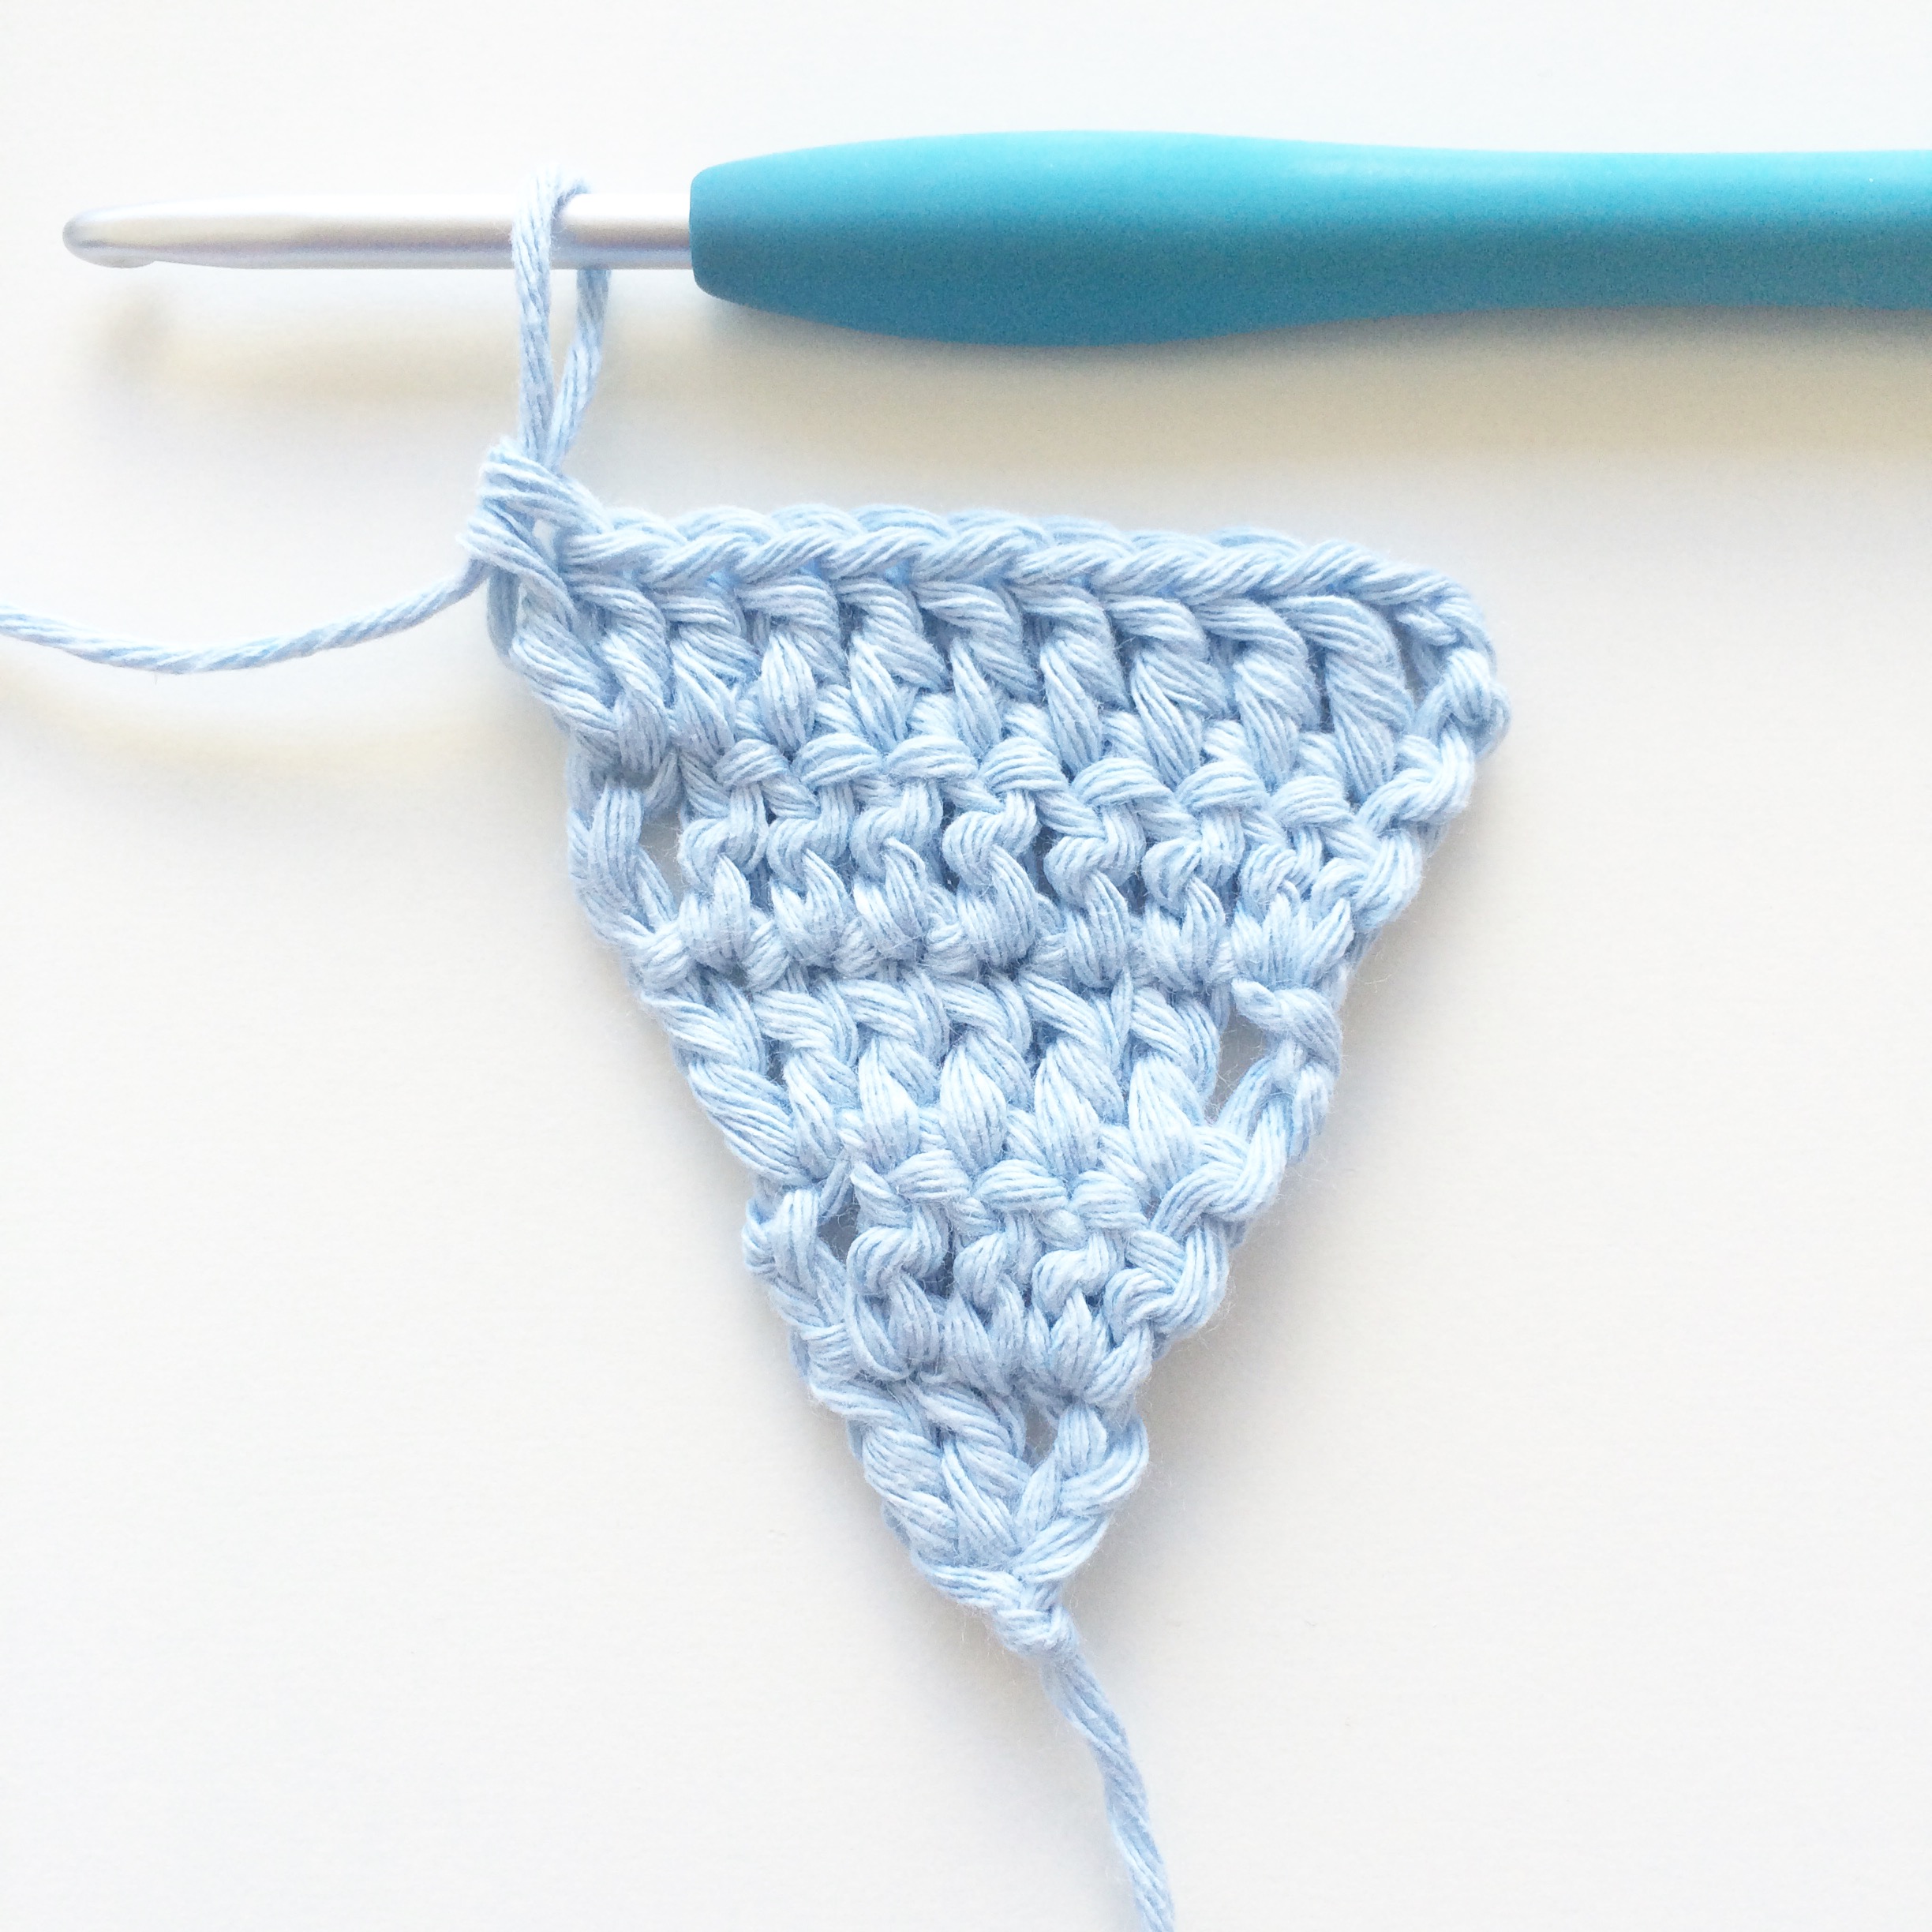
Round 6
Turn work and ch 3. 1 dc in the next 10 sts. There are no increases in the stitch count from this row onwards. (Total 11 dc’s)
Round 6
Round 7
Turn work and ch 3. Make 1 dc in next 2 sts. Then (ch 2, skip 2 sts and make 1 dc in the next st) twice. Make 1 dc each in the last 2 remaining sts. (Total 7 dc’s & 2 ch 2 spaces)
Round 7
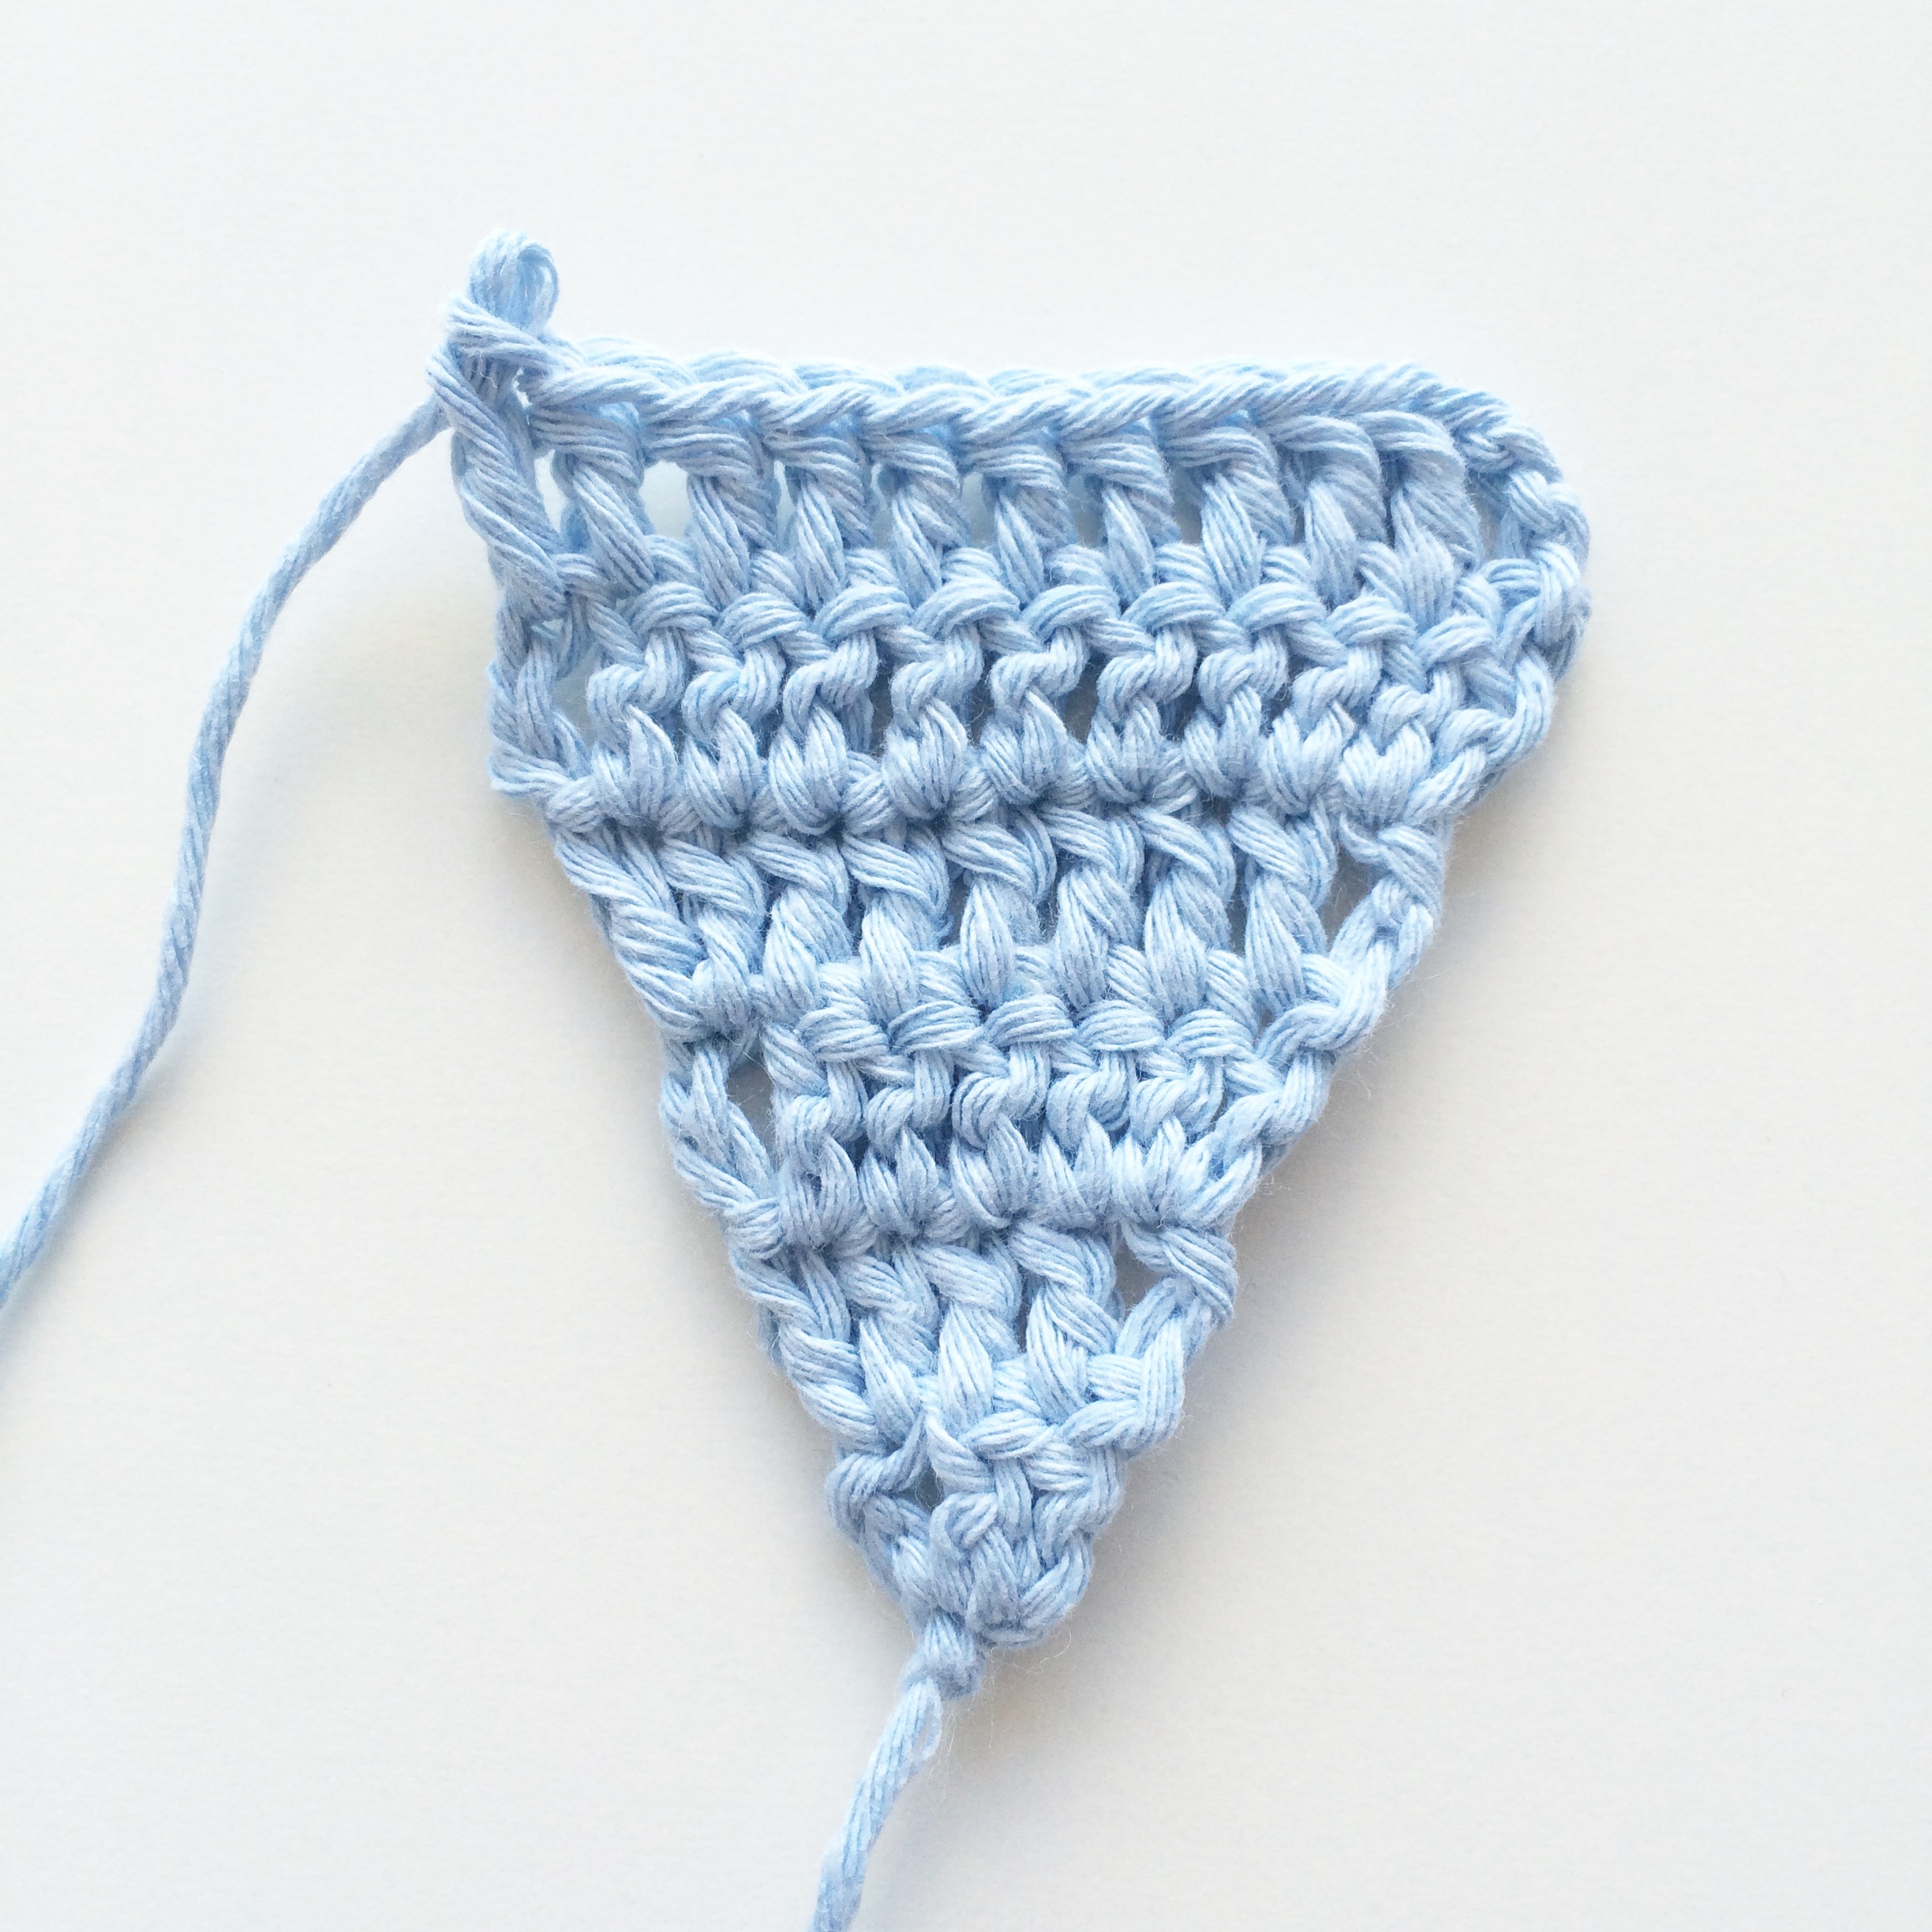
Round 8
Turn work and ch 3. Make 1 dc in next 2 sts. Then (ch 2, skip 2 sts and make 1 dc in the next st) twice. Make 1 dc each in the last 2 remaining sts. (Total 7 dc’s & 2 ch 2 spaces)
Round 8
Round 9
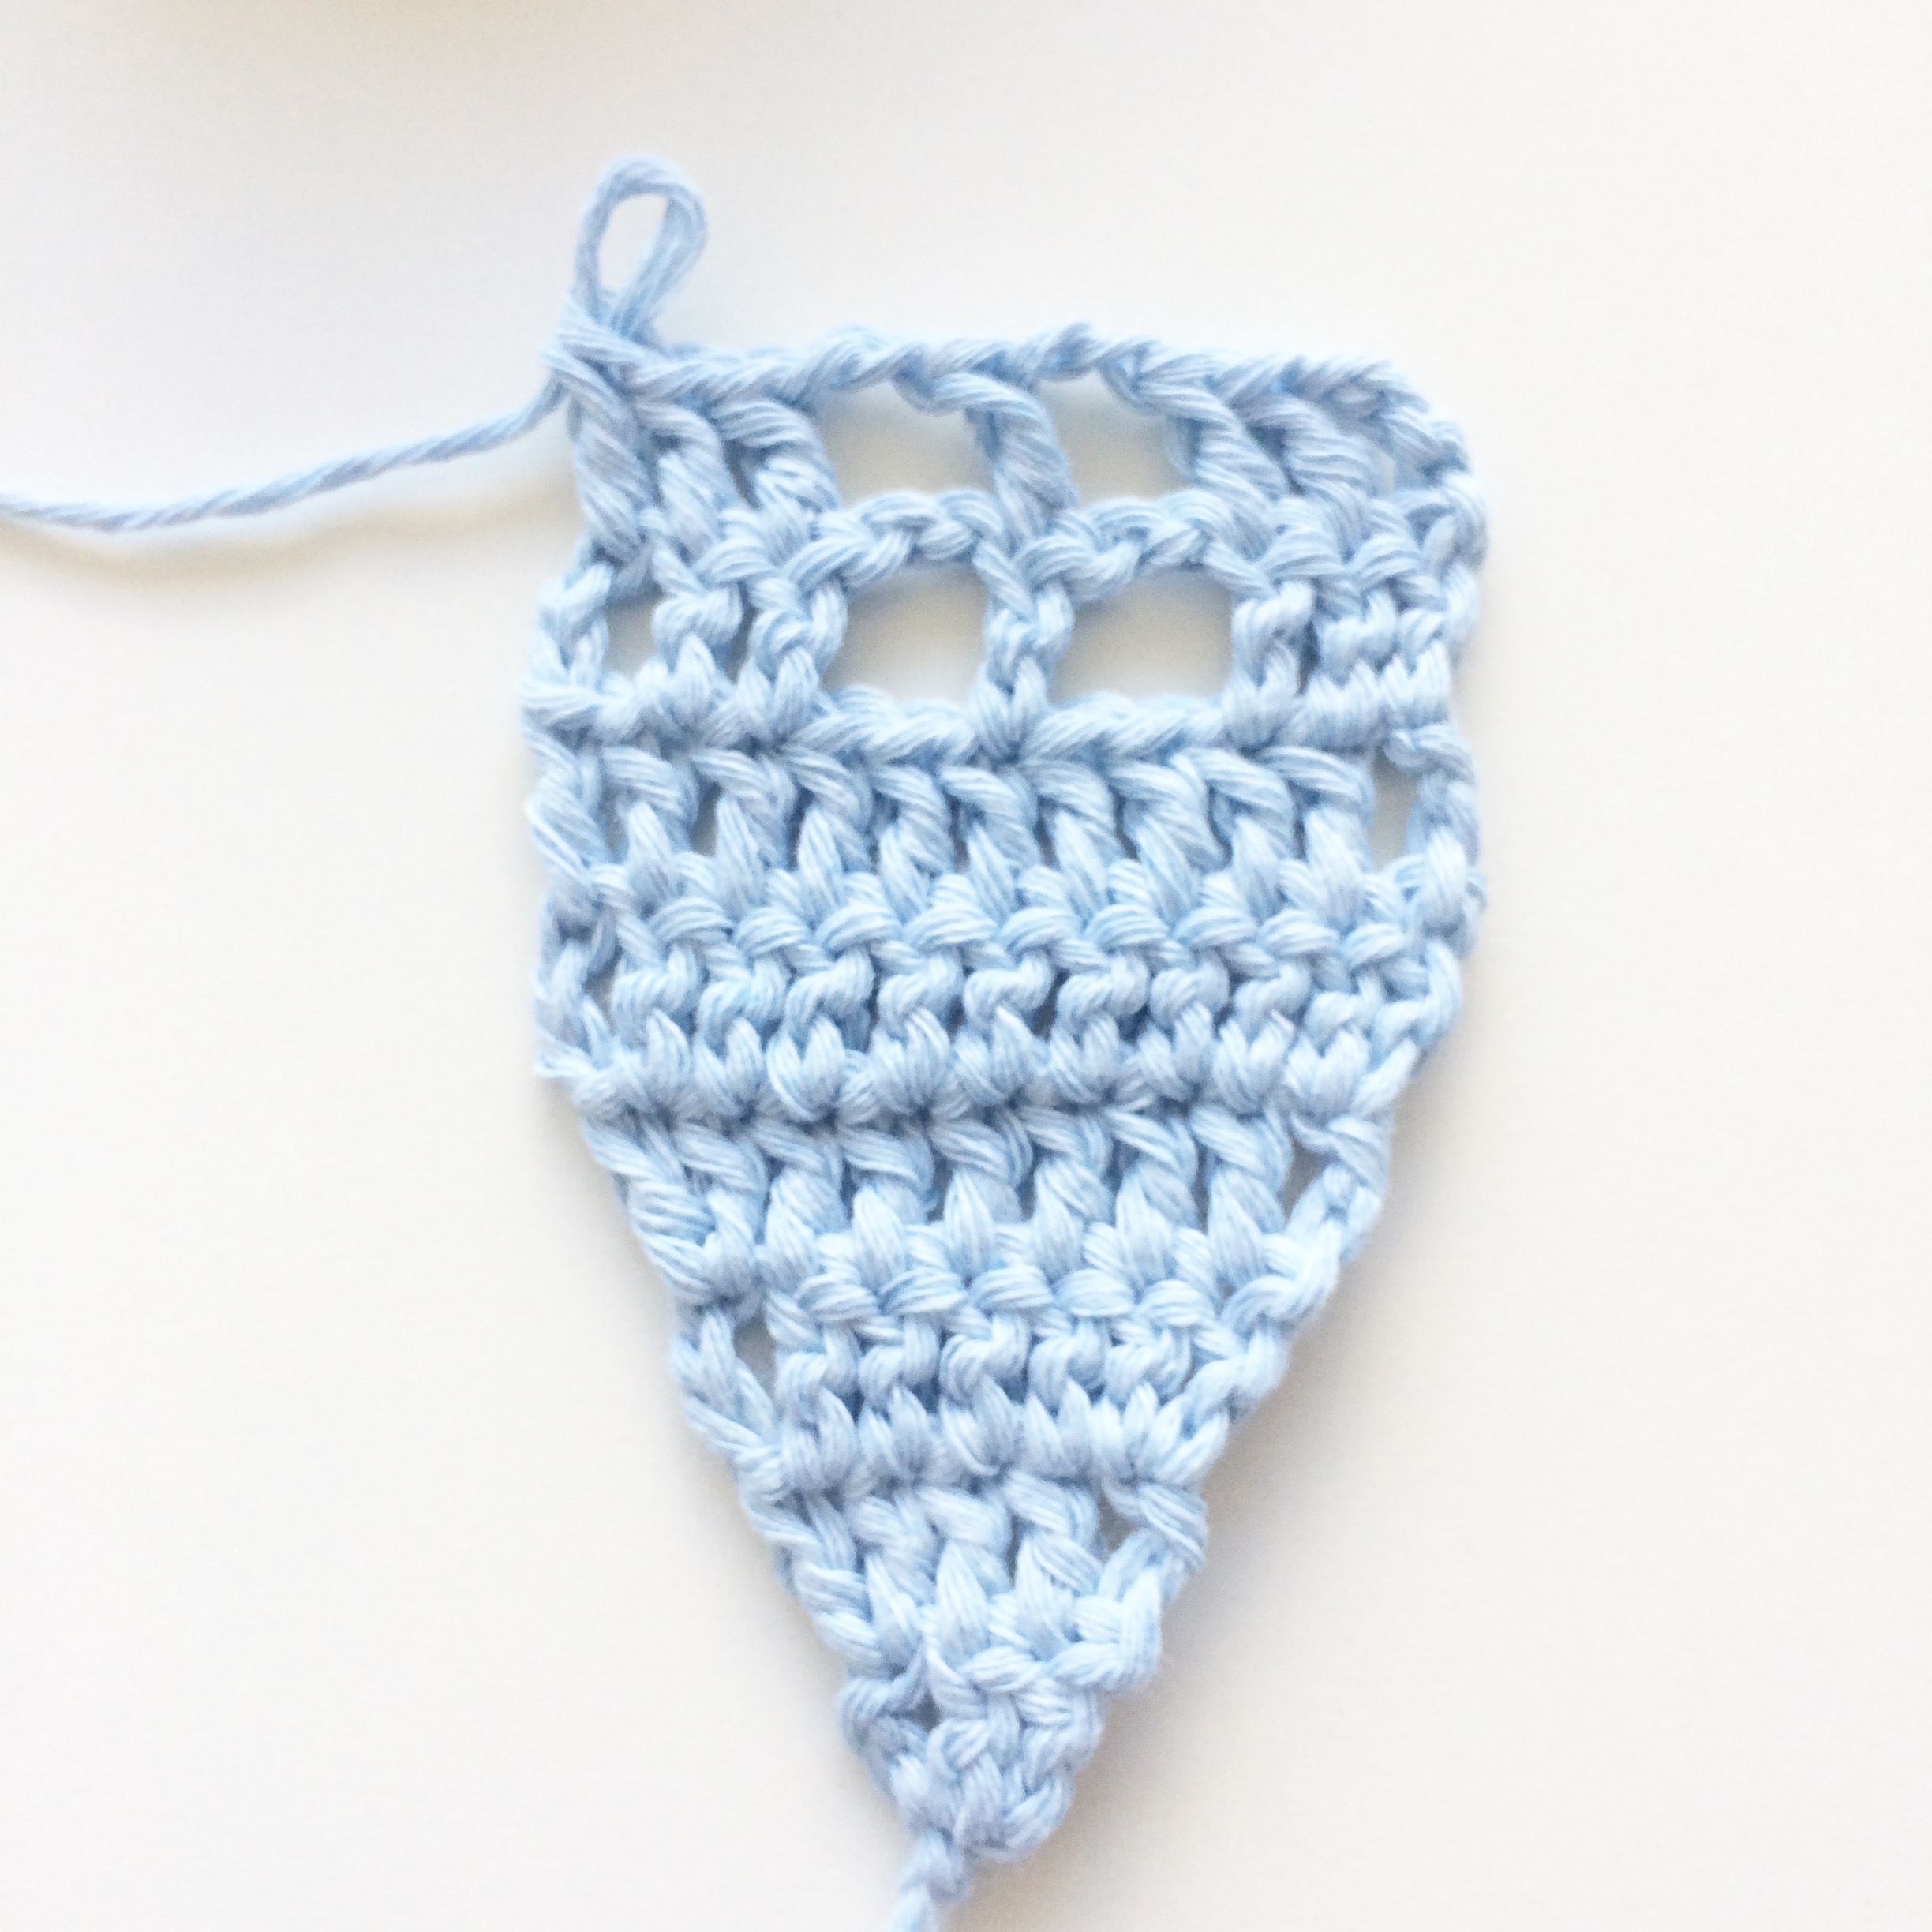
Turn work and ch 3. Make 1 dc in next 2 sts. Then 2 dc in the 2 ch-sp, 1 dc in the next st (which is the dc from below), 2 dc in the next 2 ch-sp and 1 dc in the last 3 sts. Cut yarn and weave in the ends. (Total 11 dc’s)
Round 9
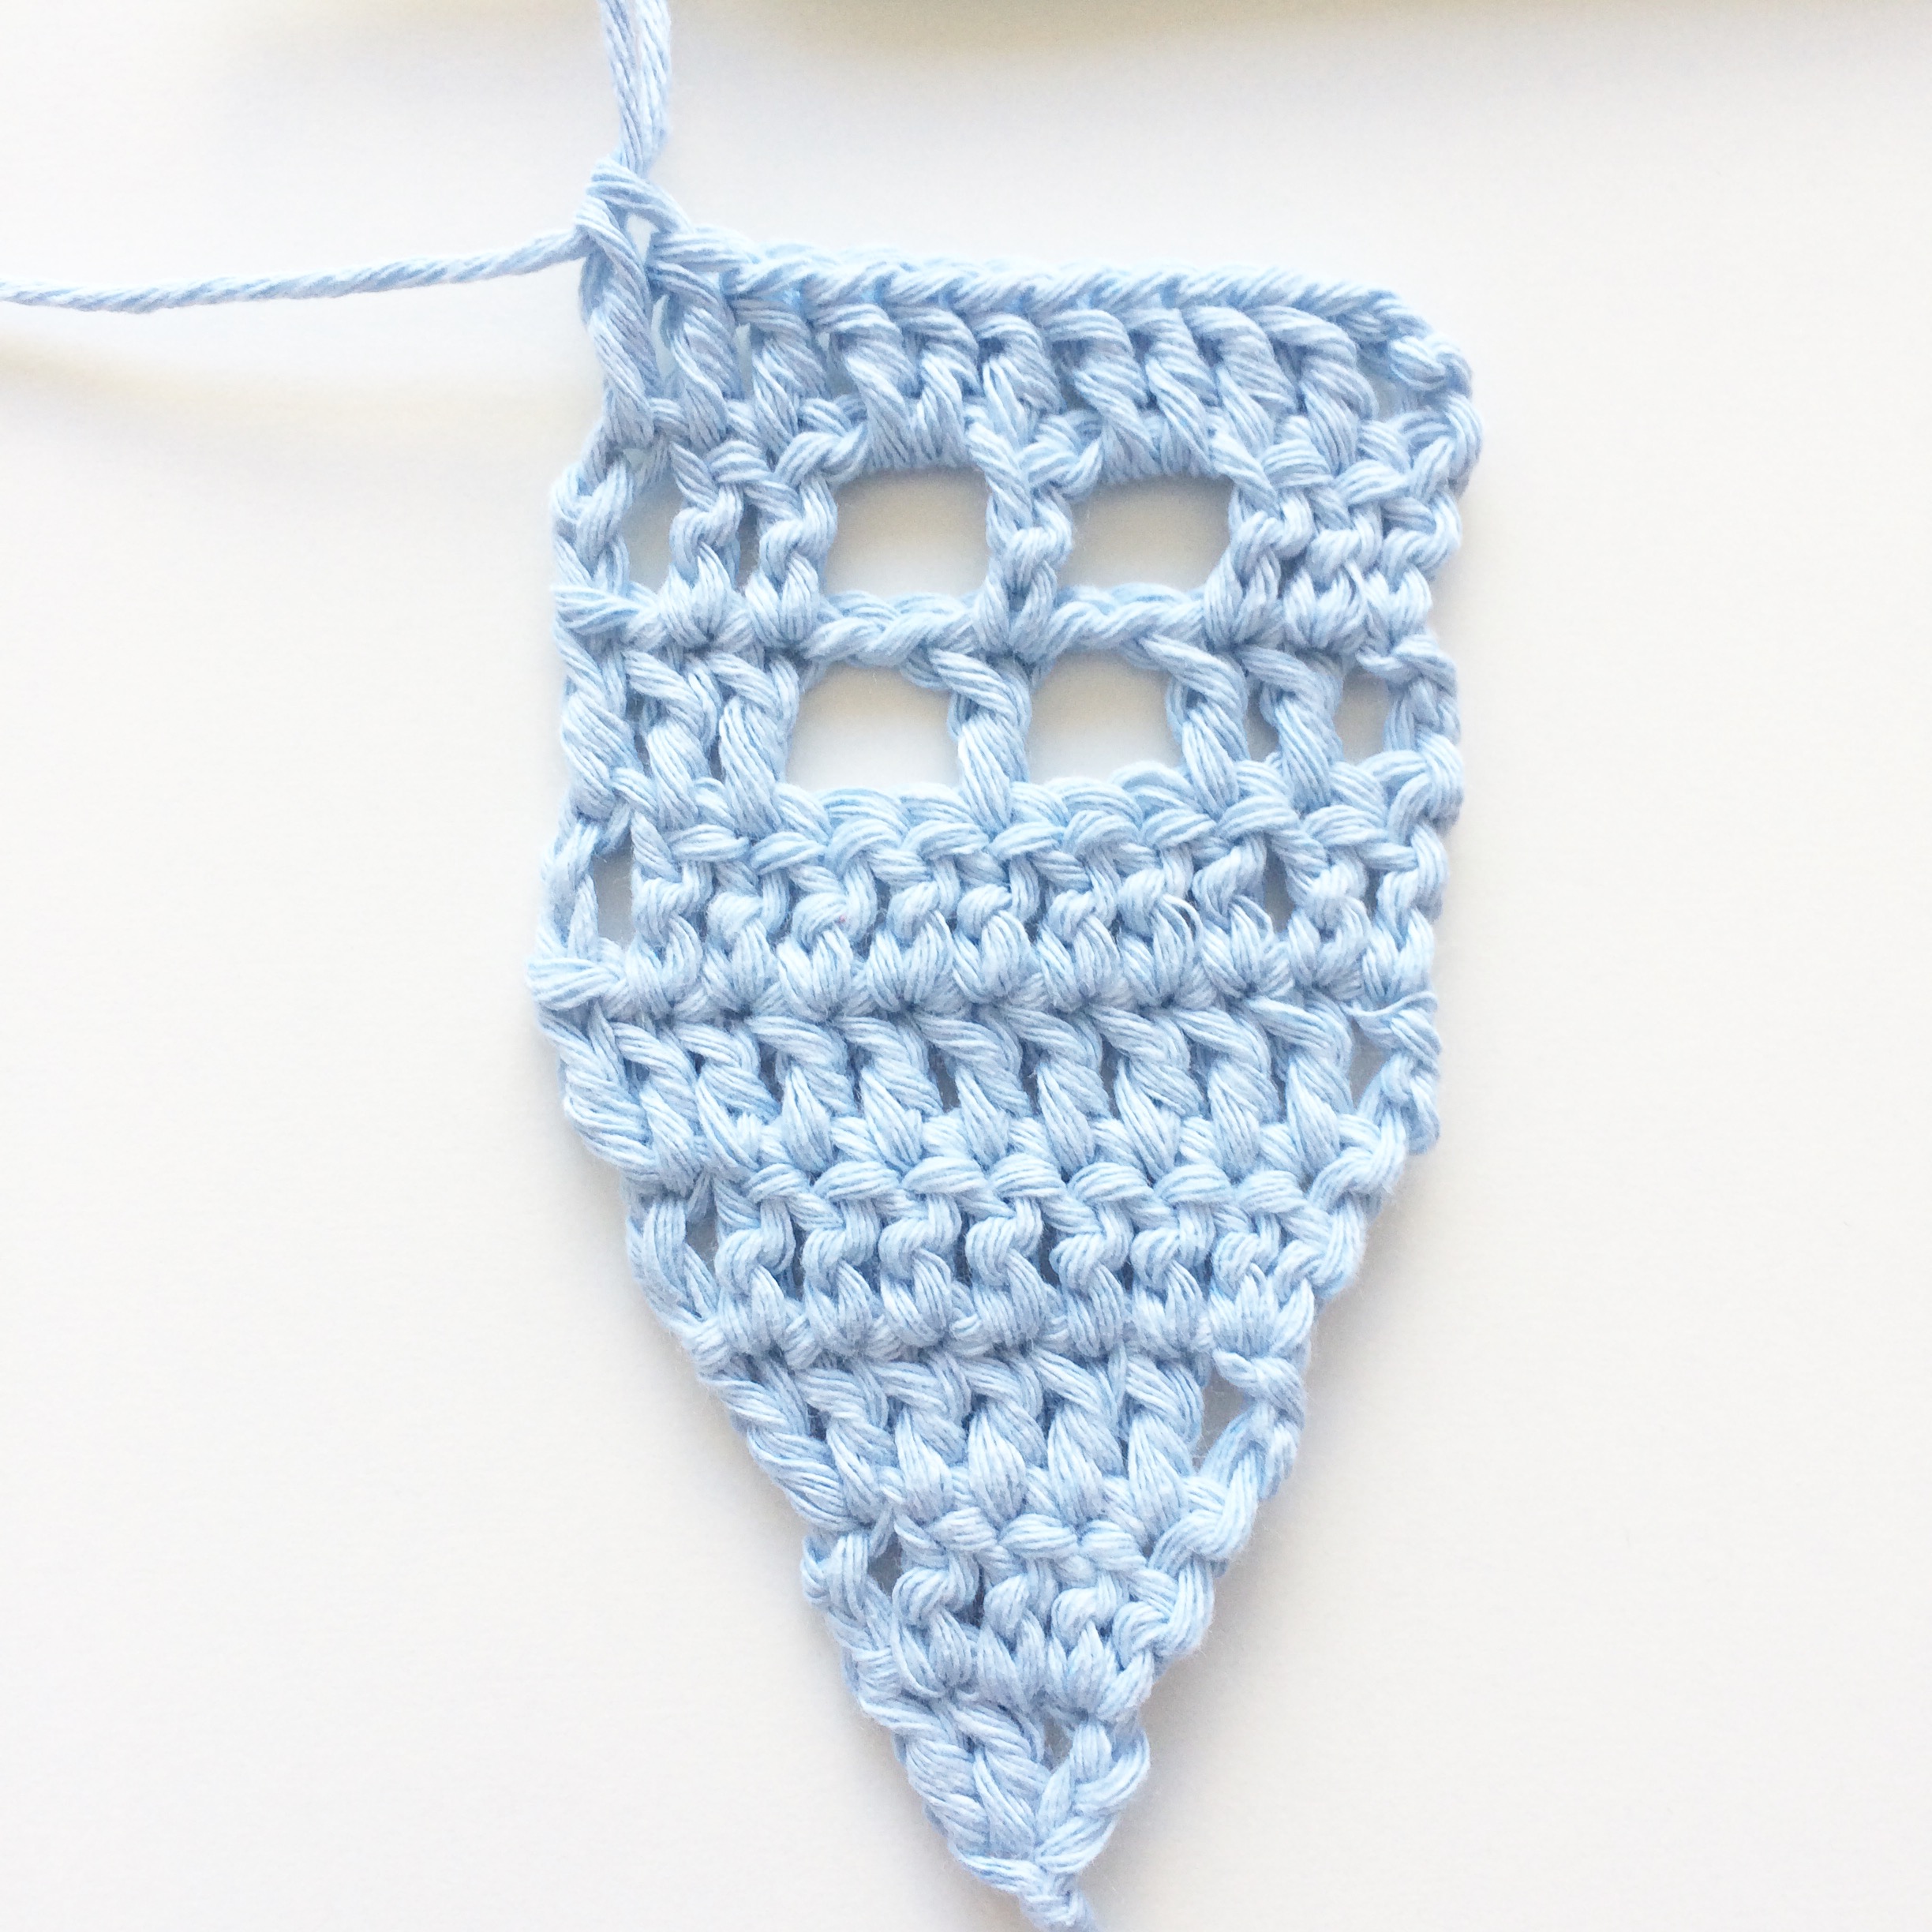
And we are ready to flip our houses!
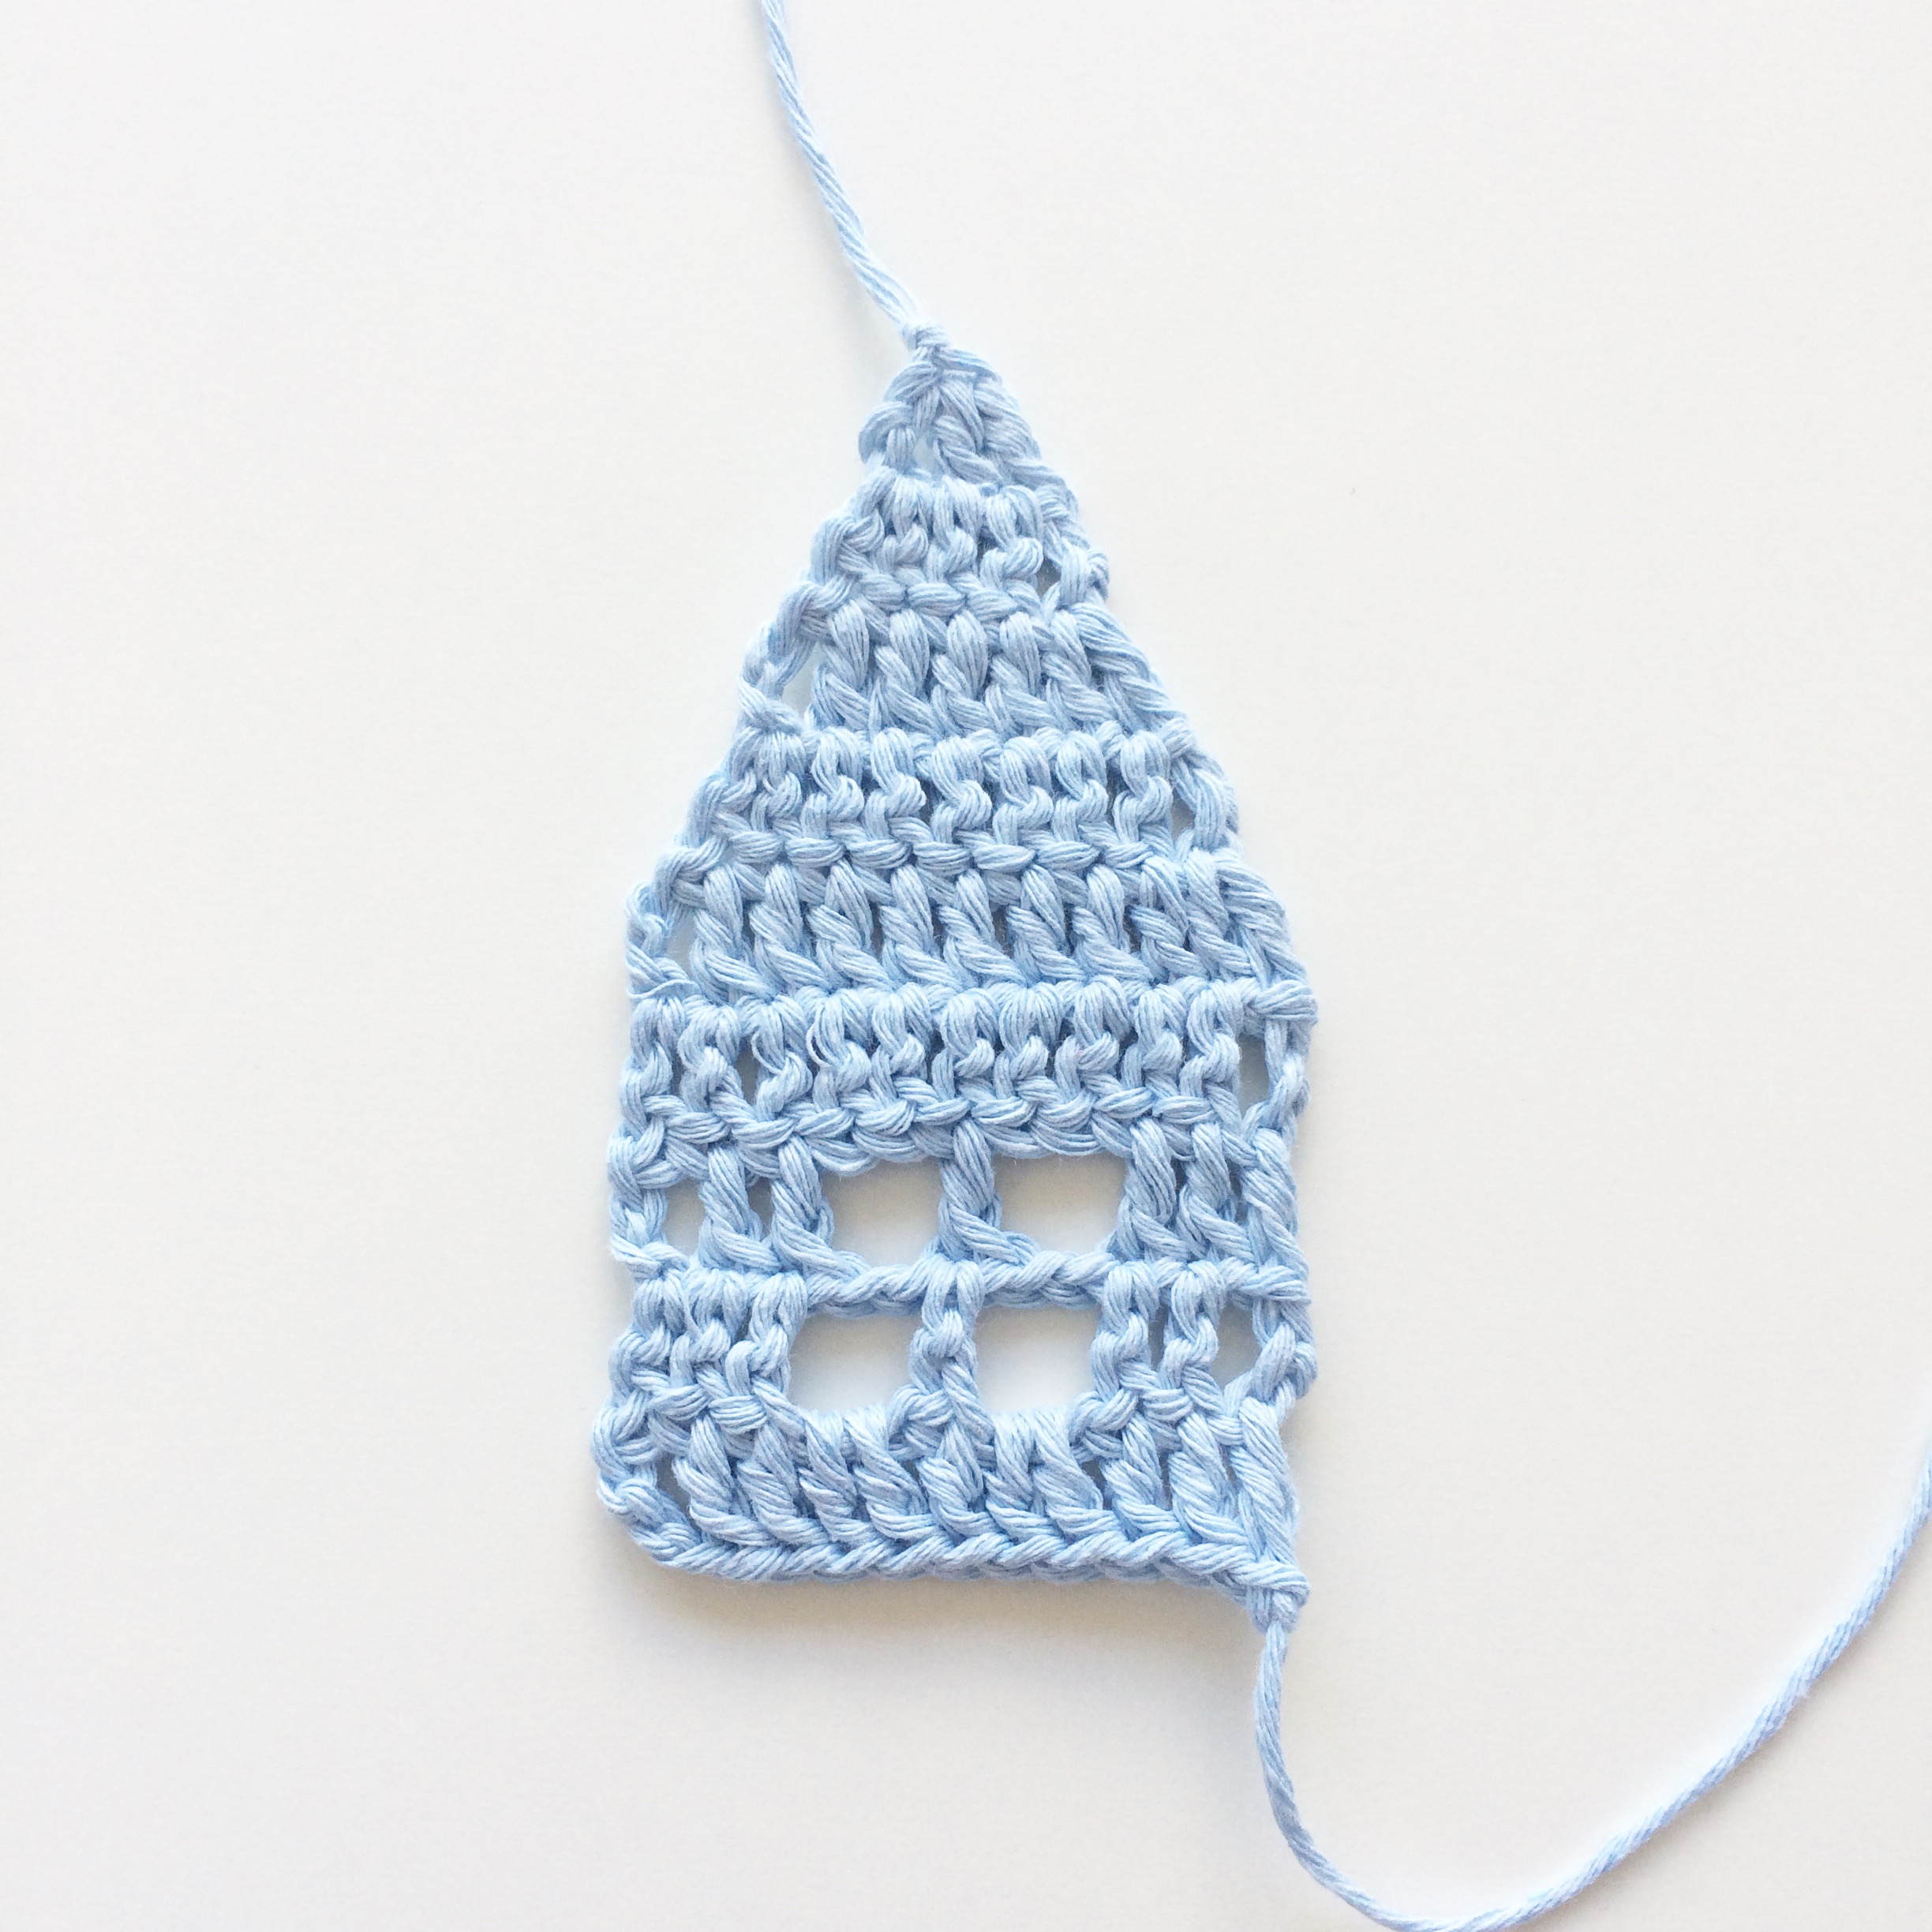
Little crochet house
All weaved in and ready to move in!
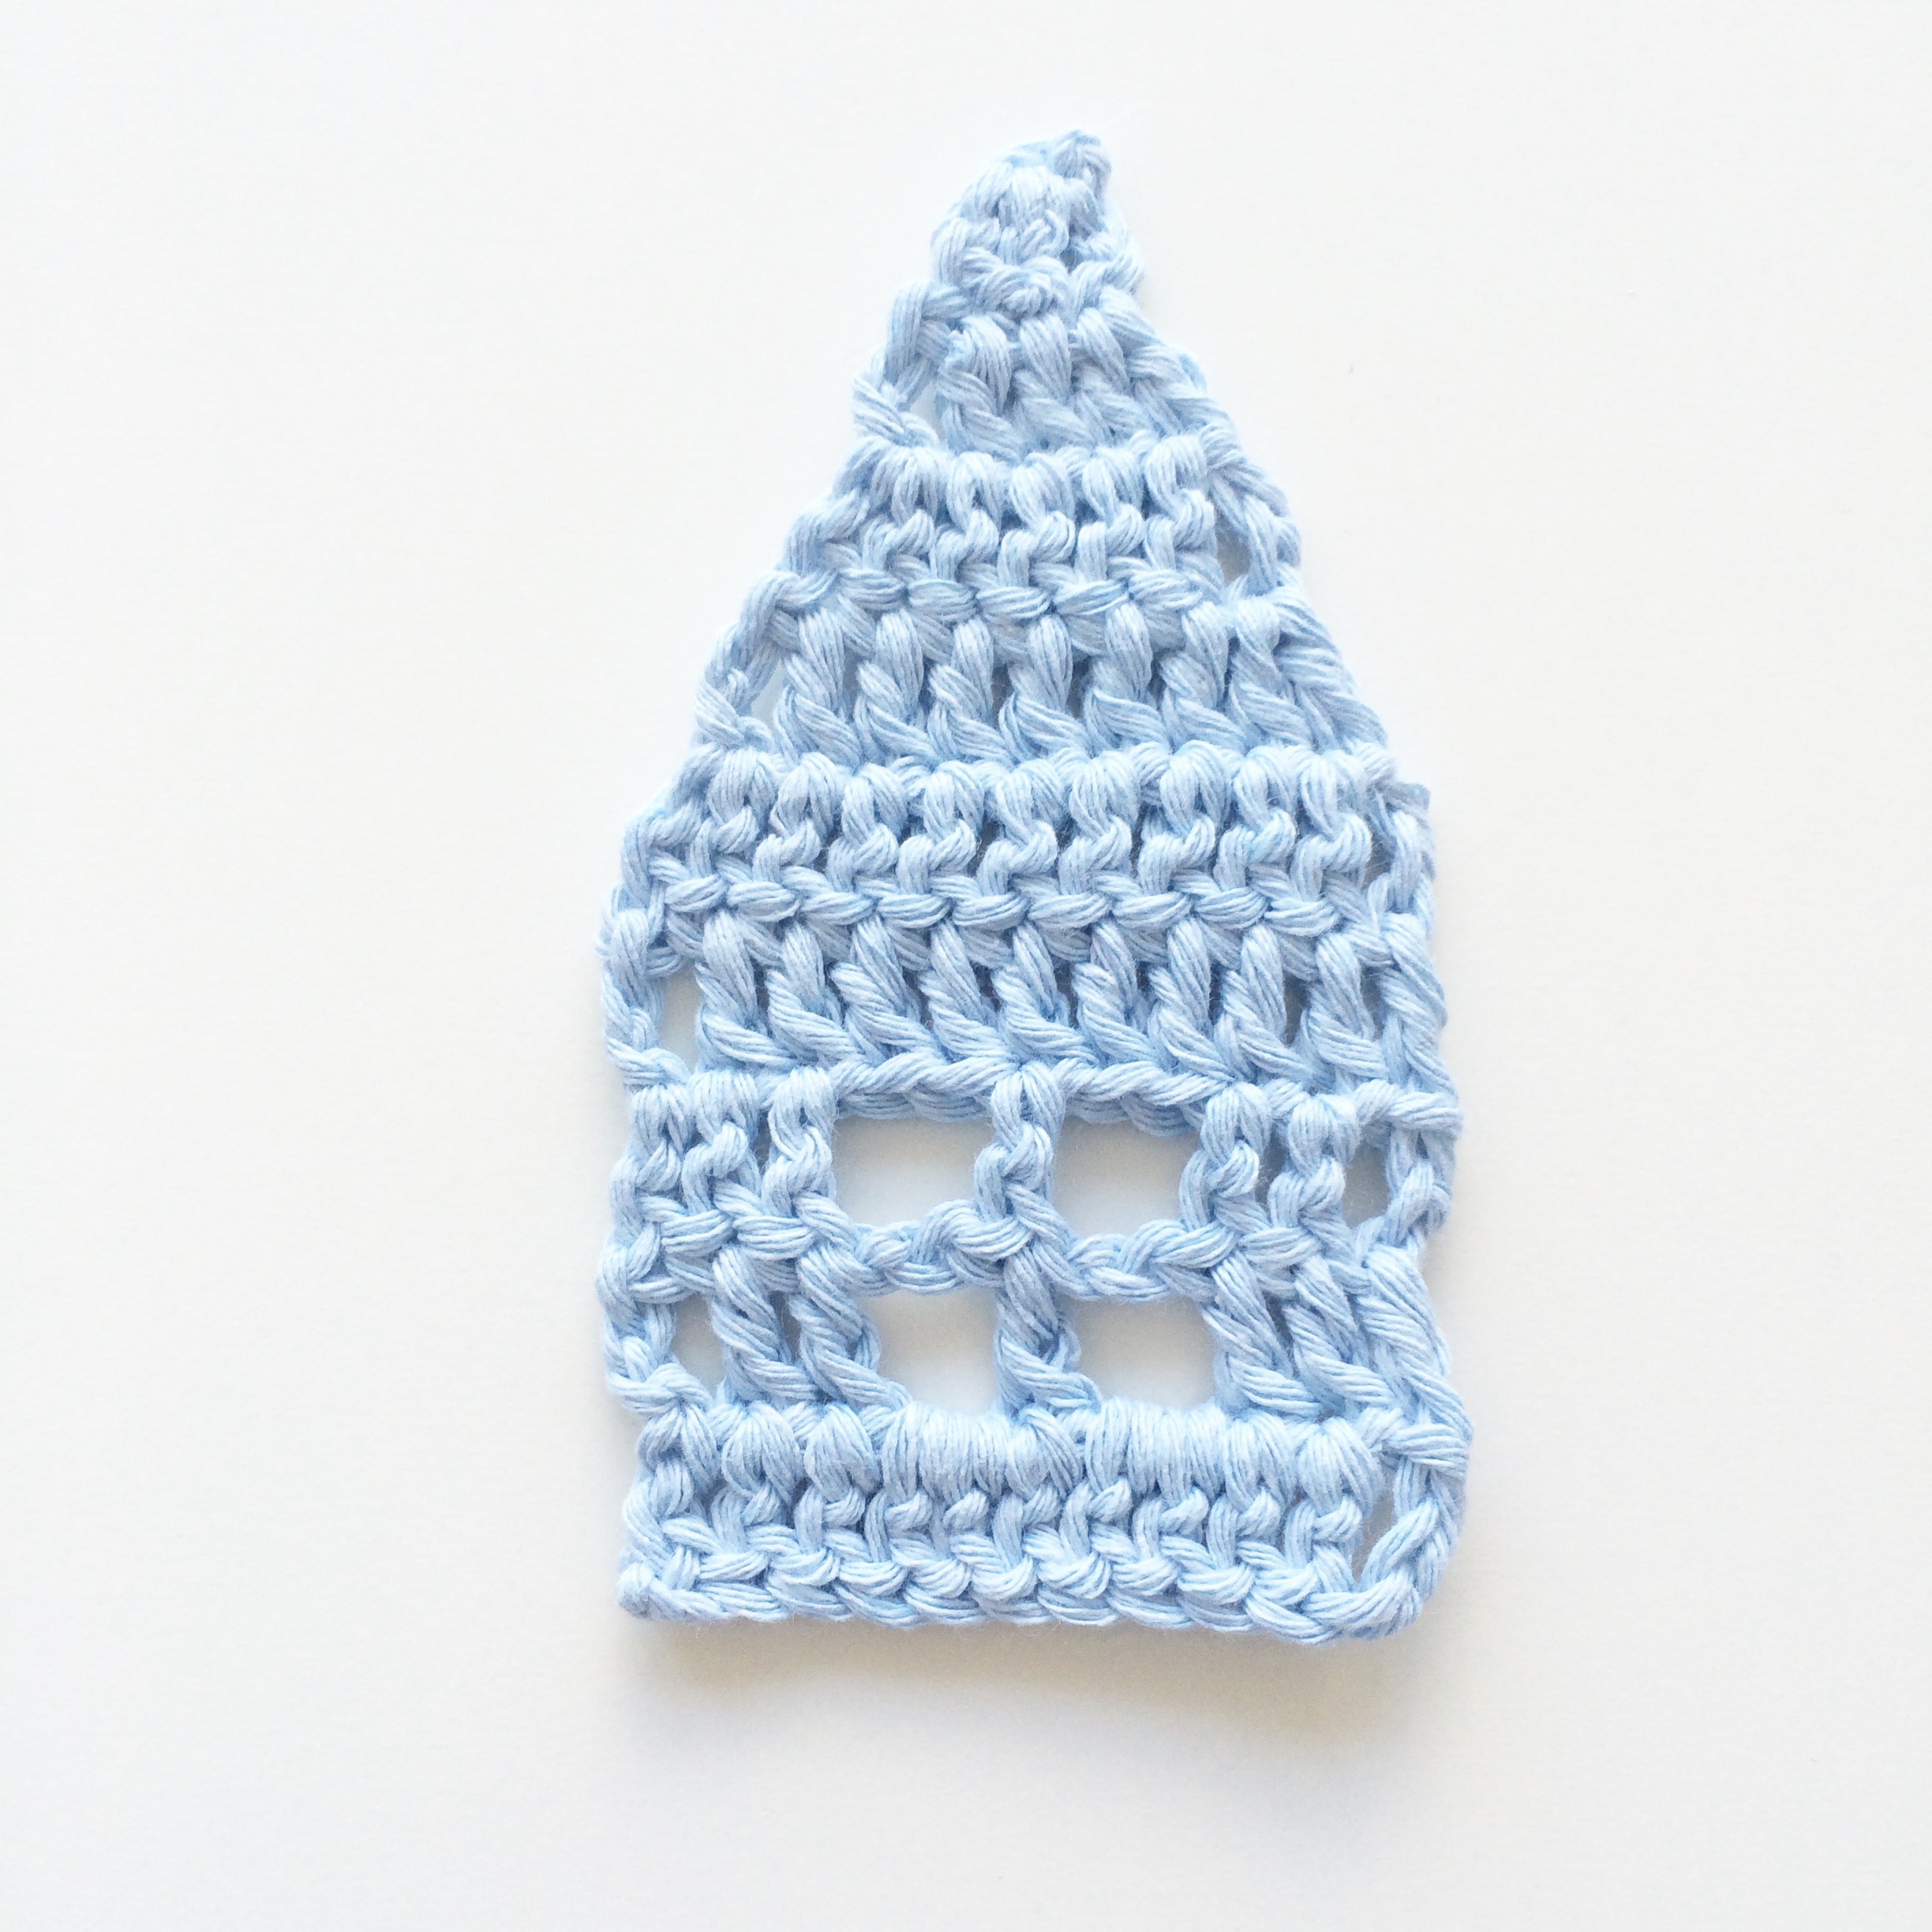
Little crochet house
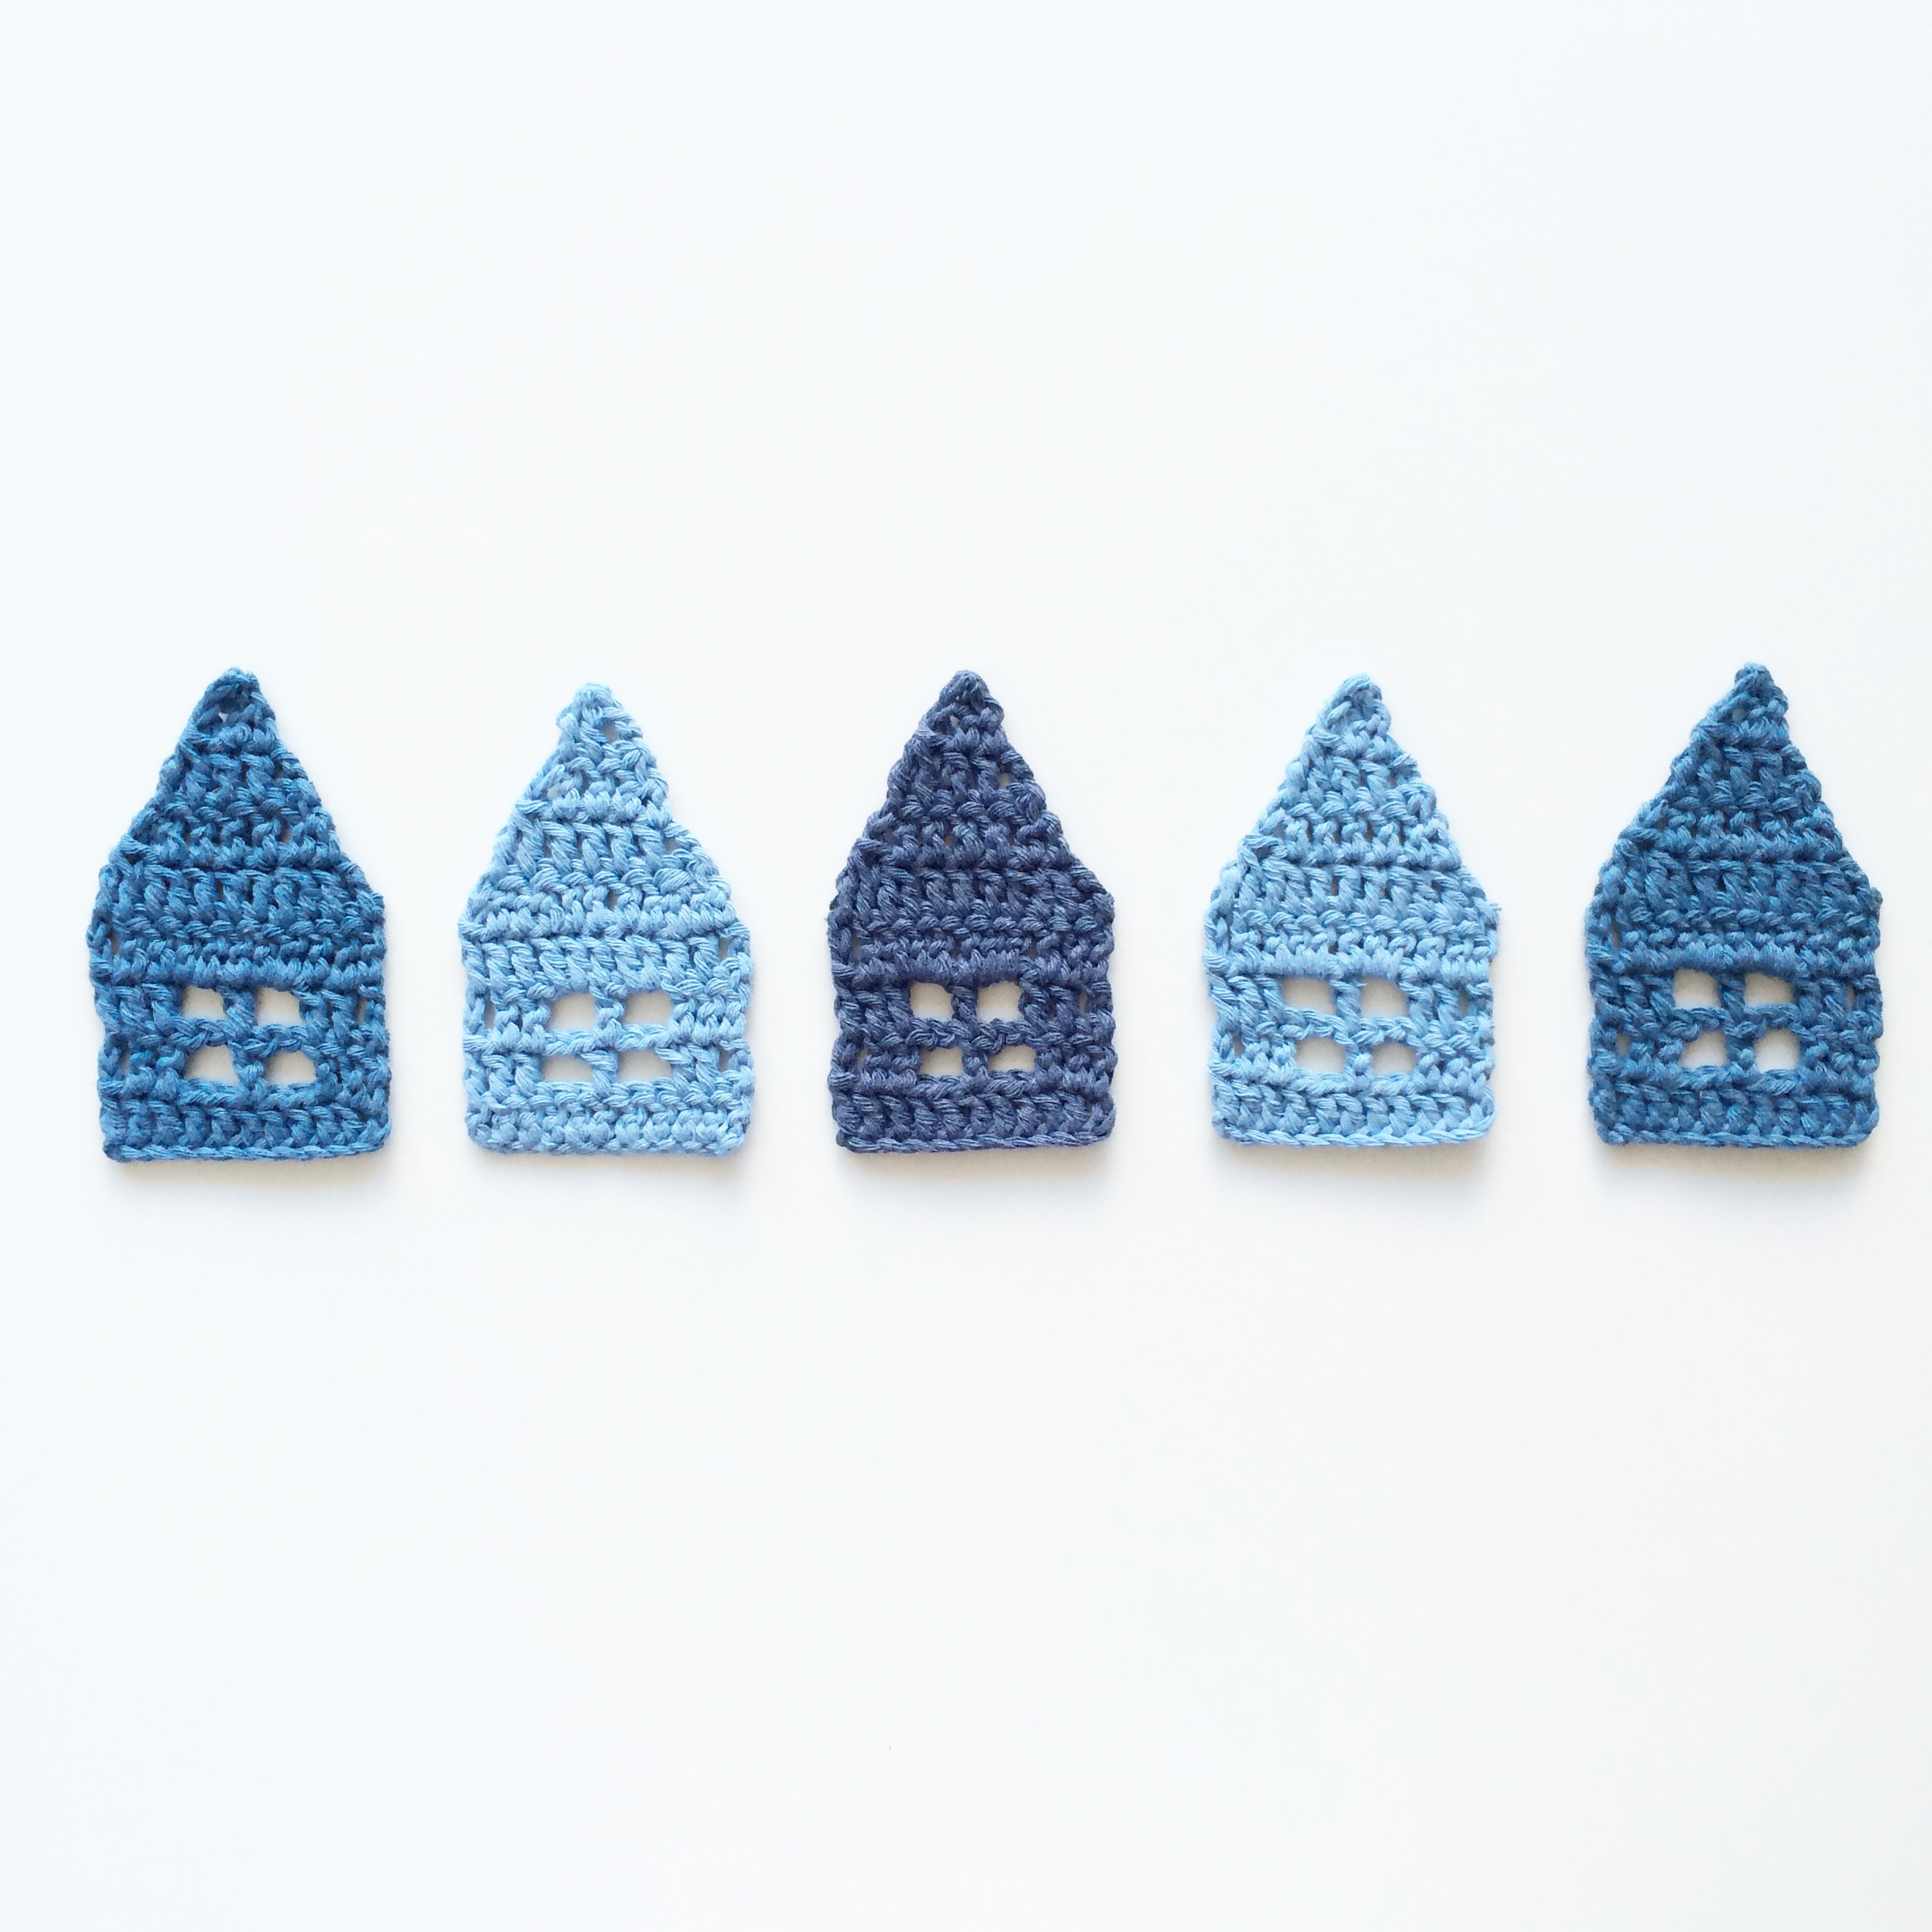
Now, I used a 4.5 mm hook while making the sample above but I also made a few using a 4mm hook. You can see the difference in size below.
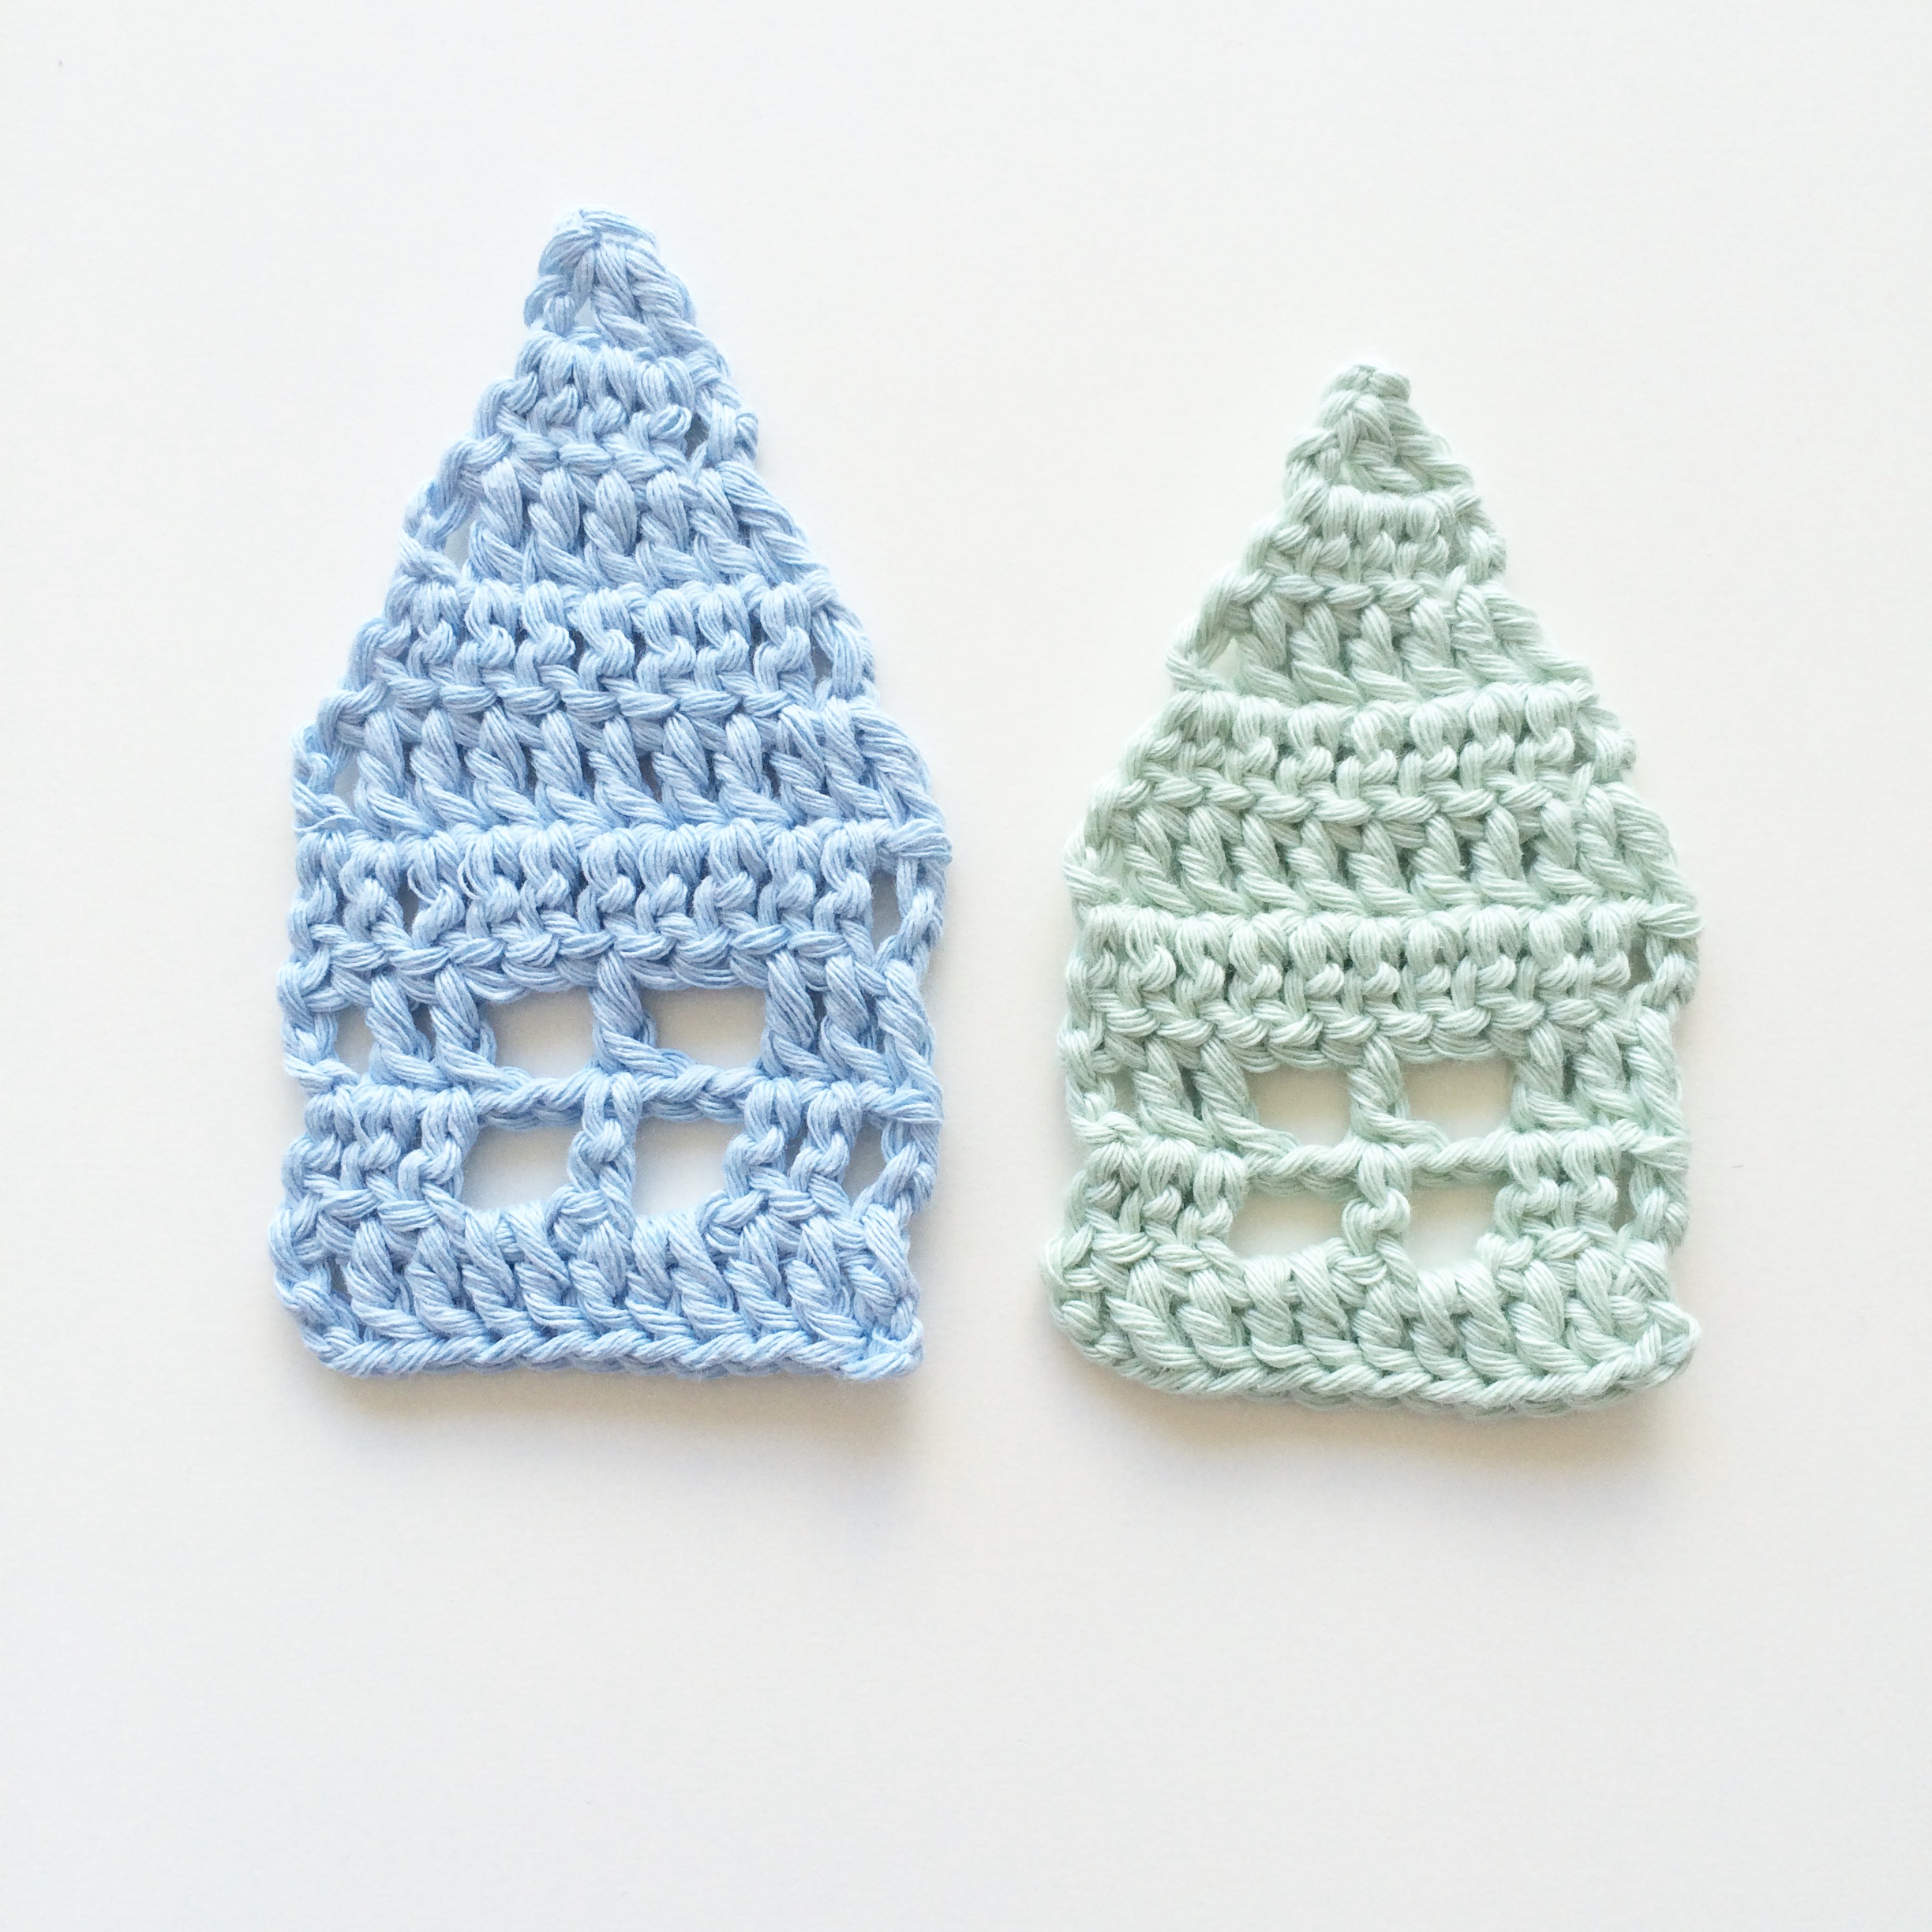
Made with 4.5mm (left) & 4 mm (right)
The 4 mm ones do curl a bit but nothing a bit of blocking wont fix.
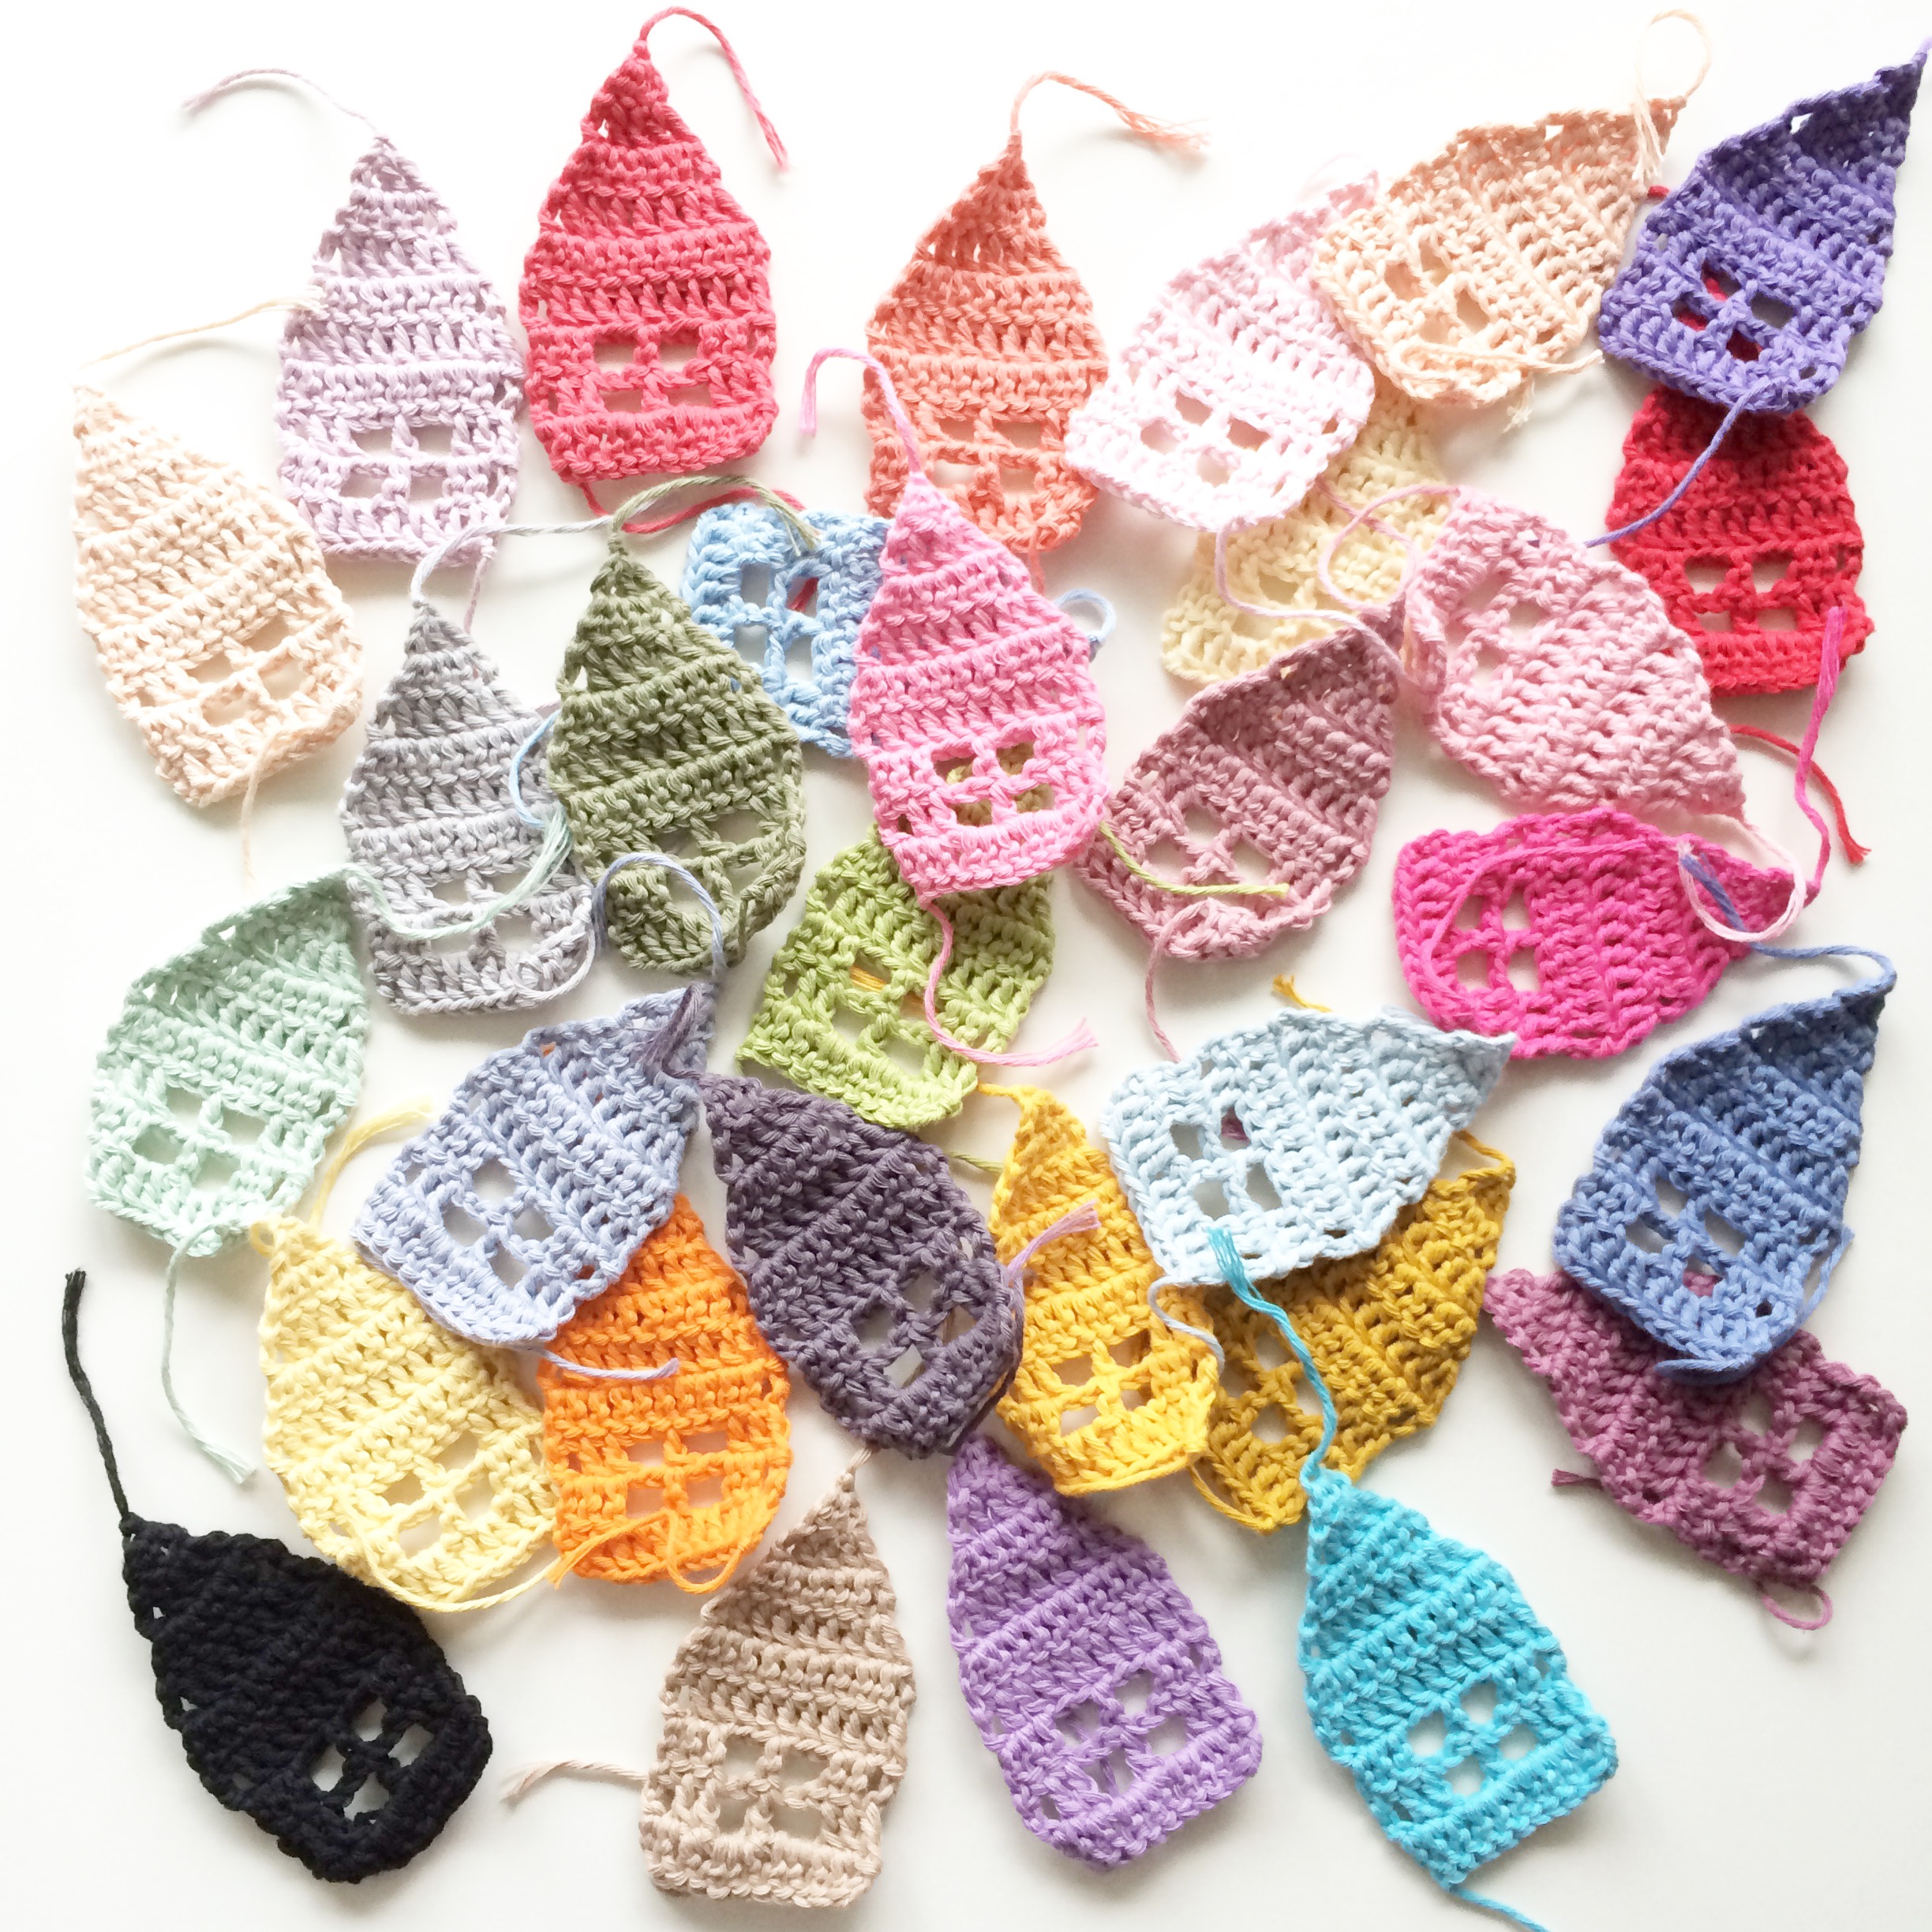
Unblocked houses
Wet blocking (either soak before pinning to the board or pin and then spray water, leave till completely dry) works well for cotton yarn. If you use acrylic yarn, then steam blocking works like magic on them. Super fast and very efficient.
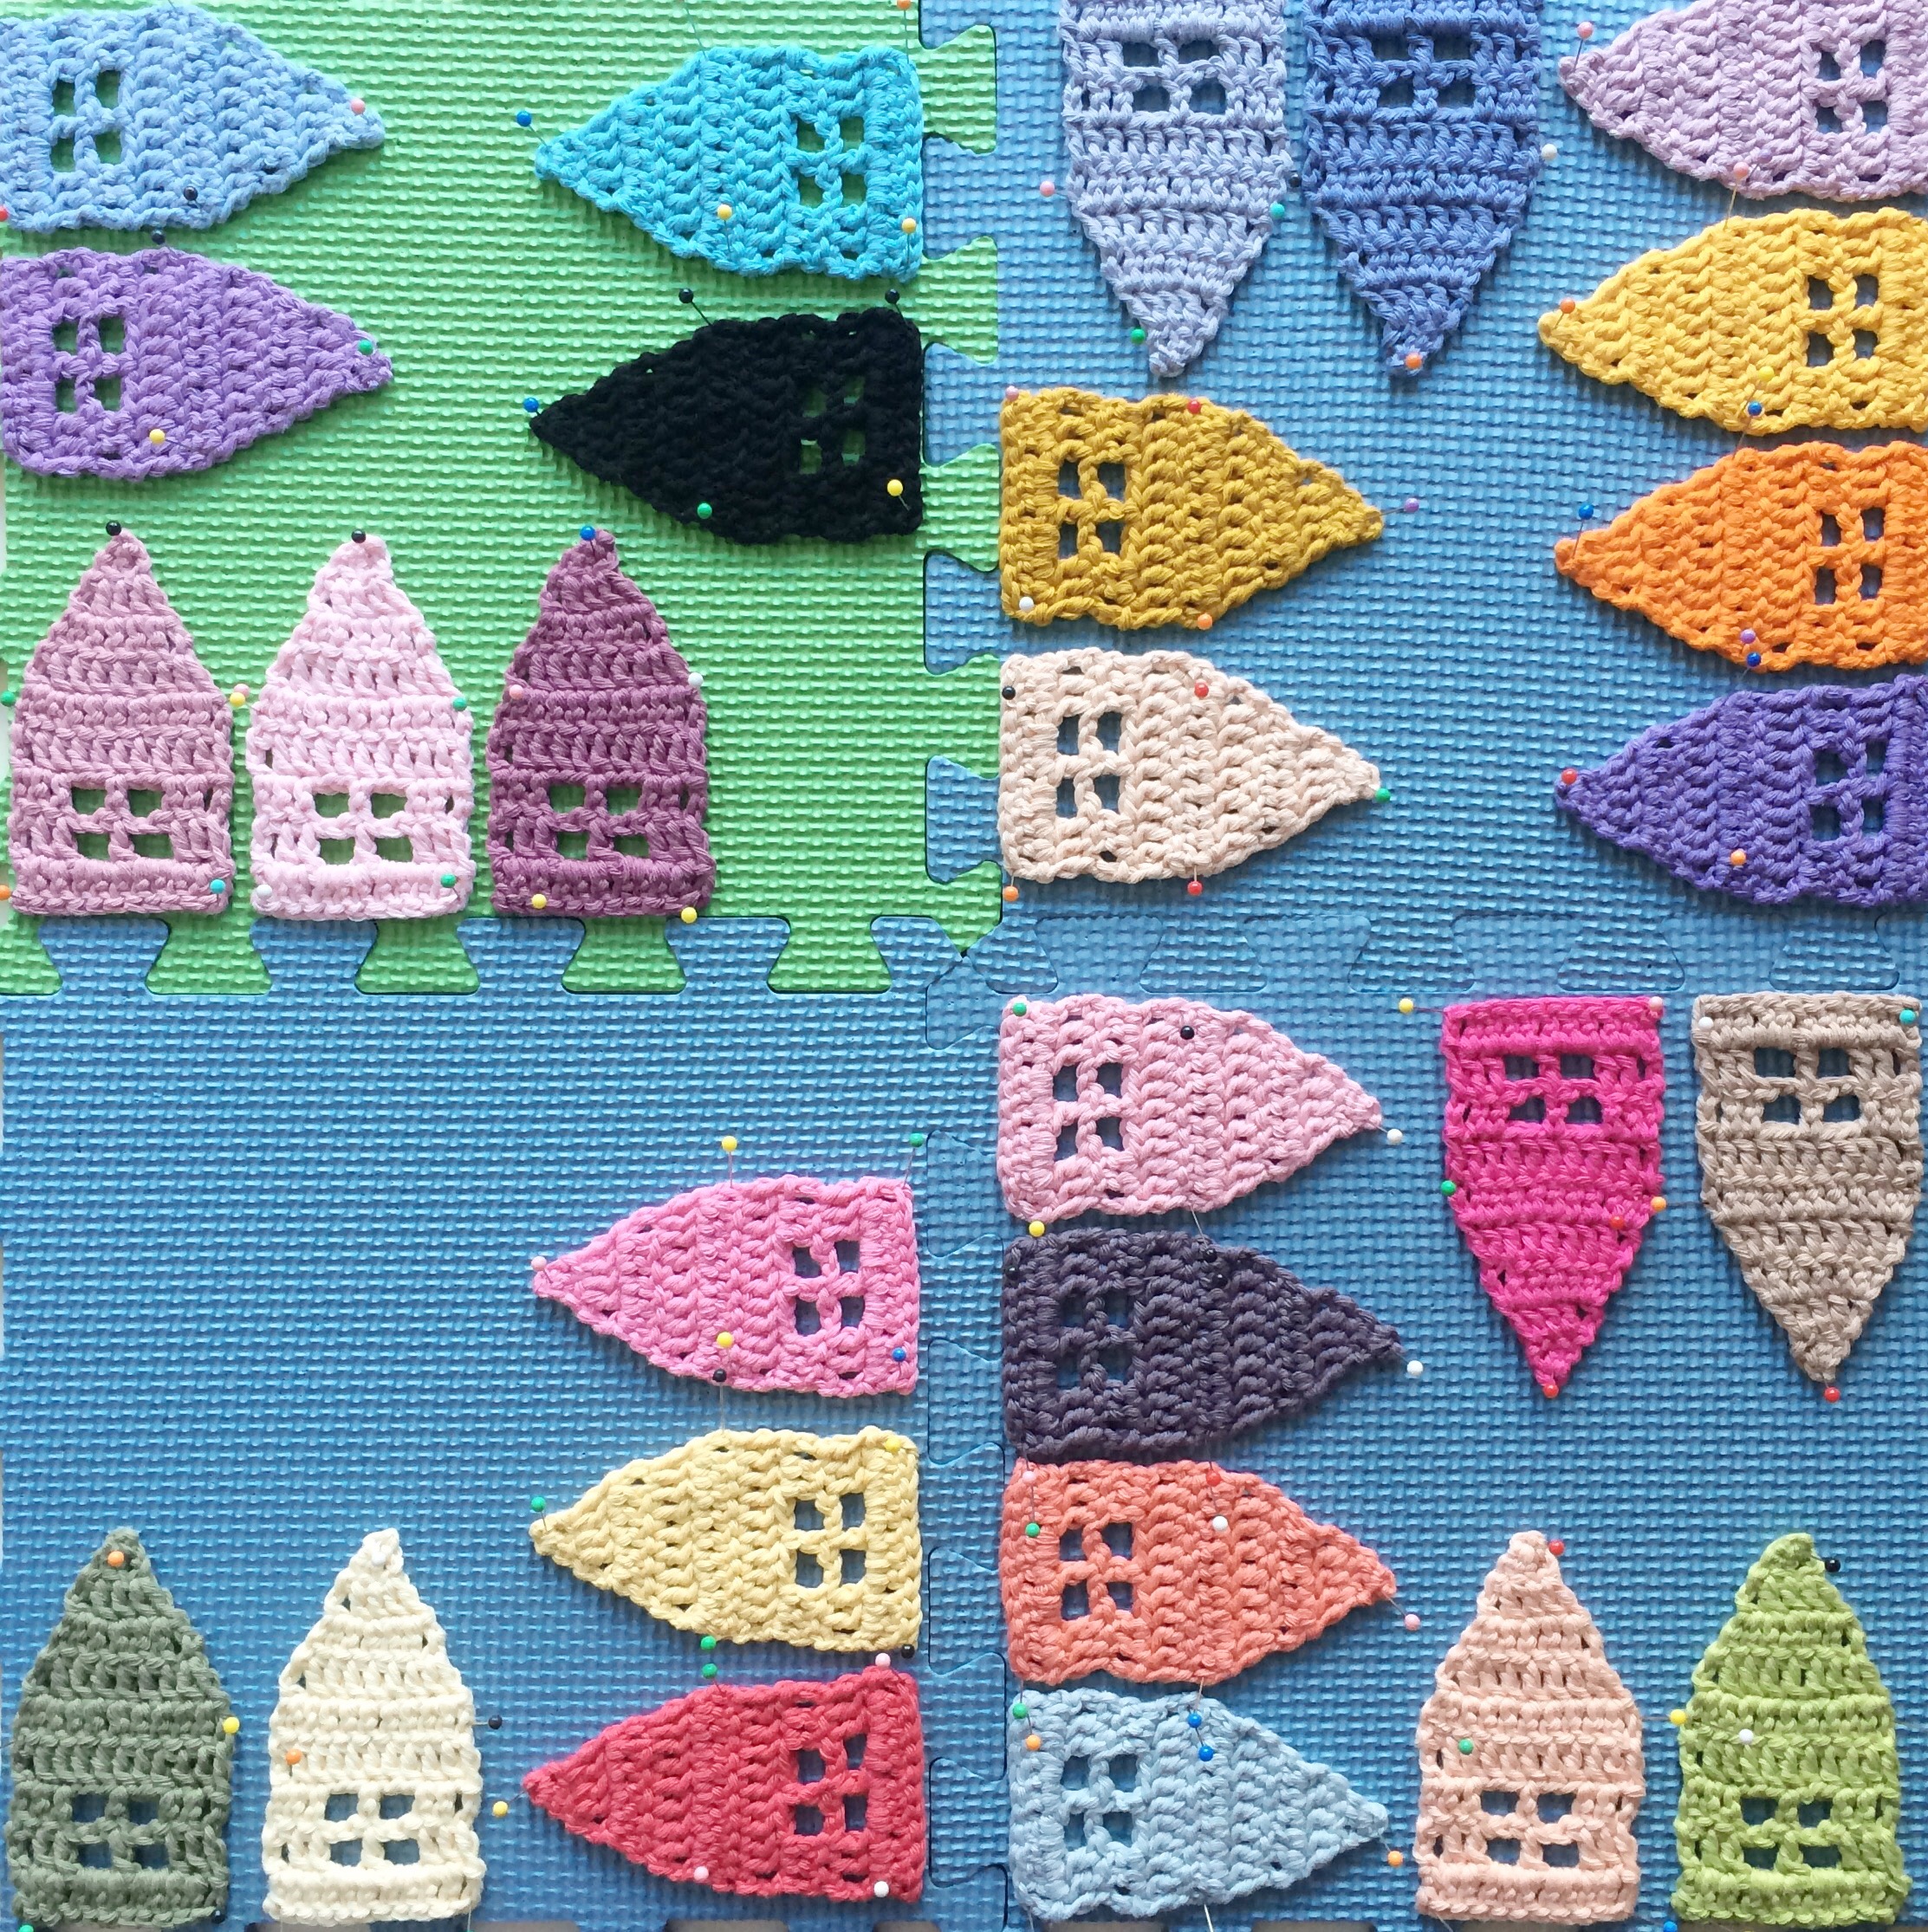
Wet blocking in progress
And we are all done!
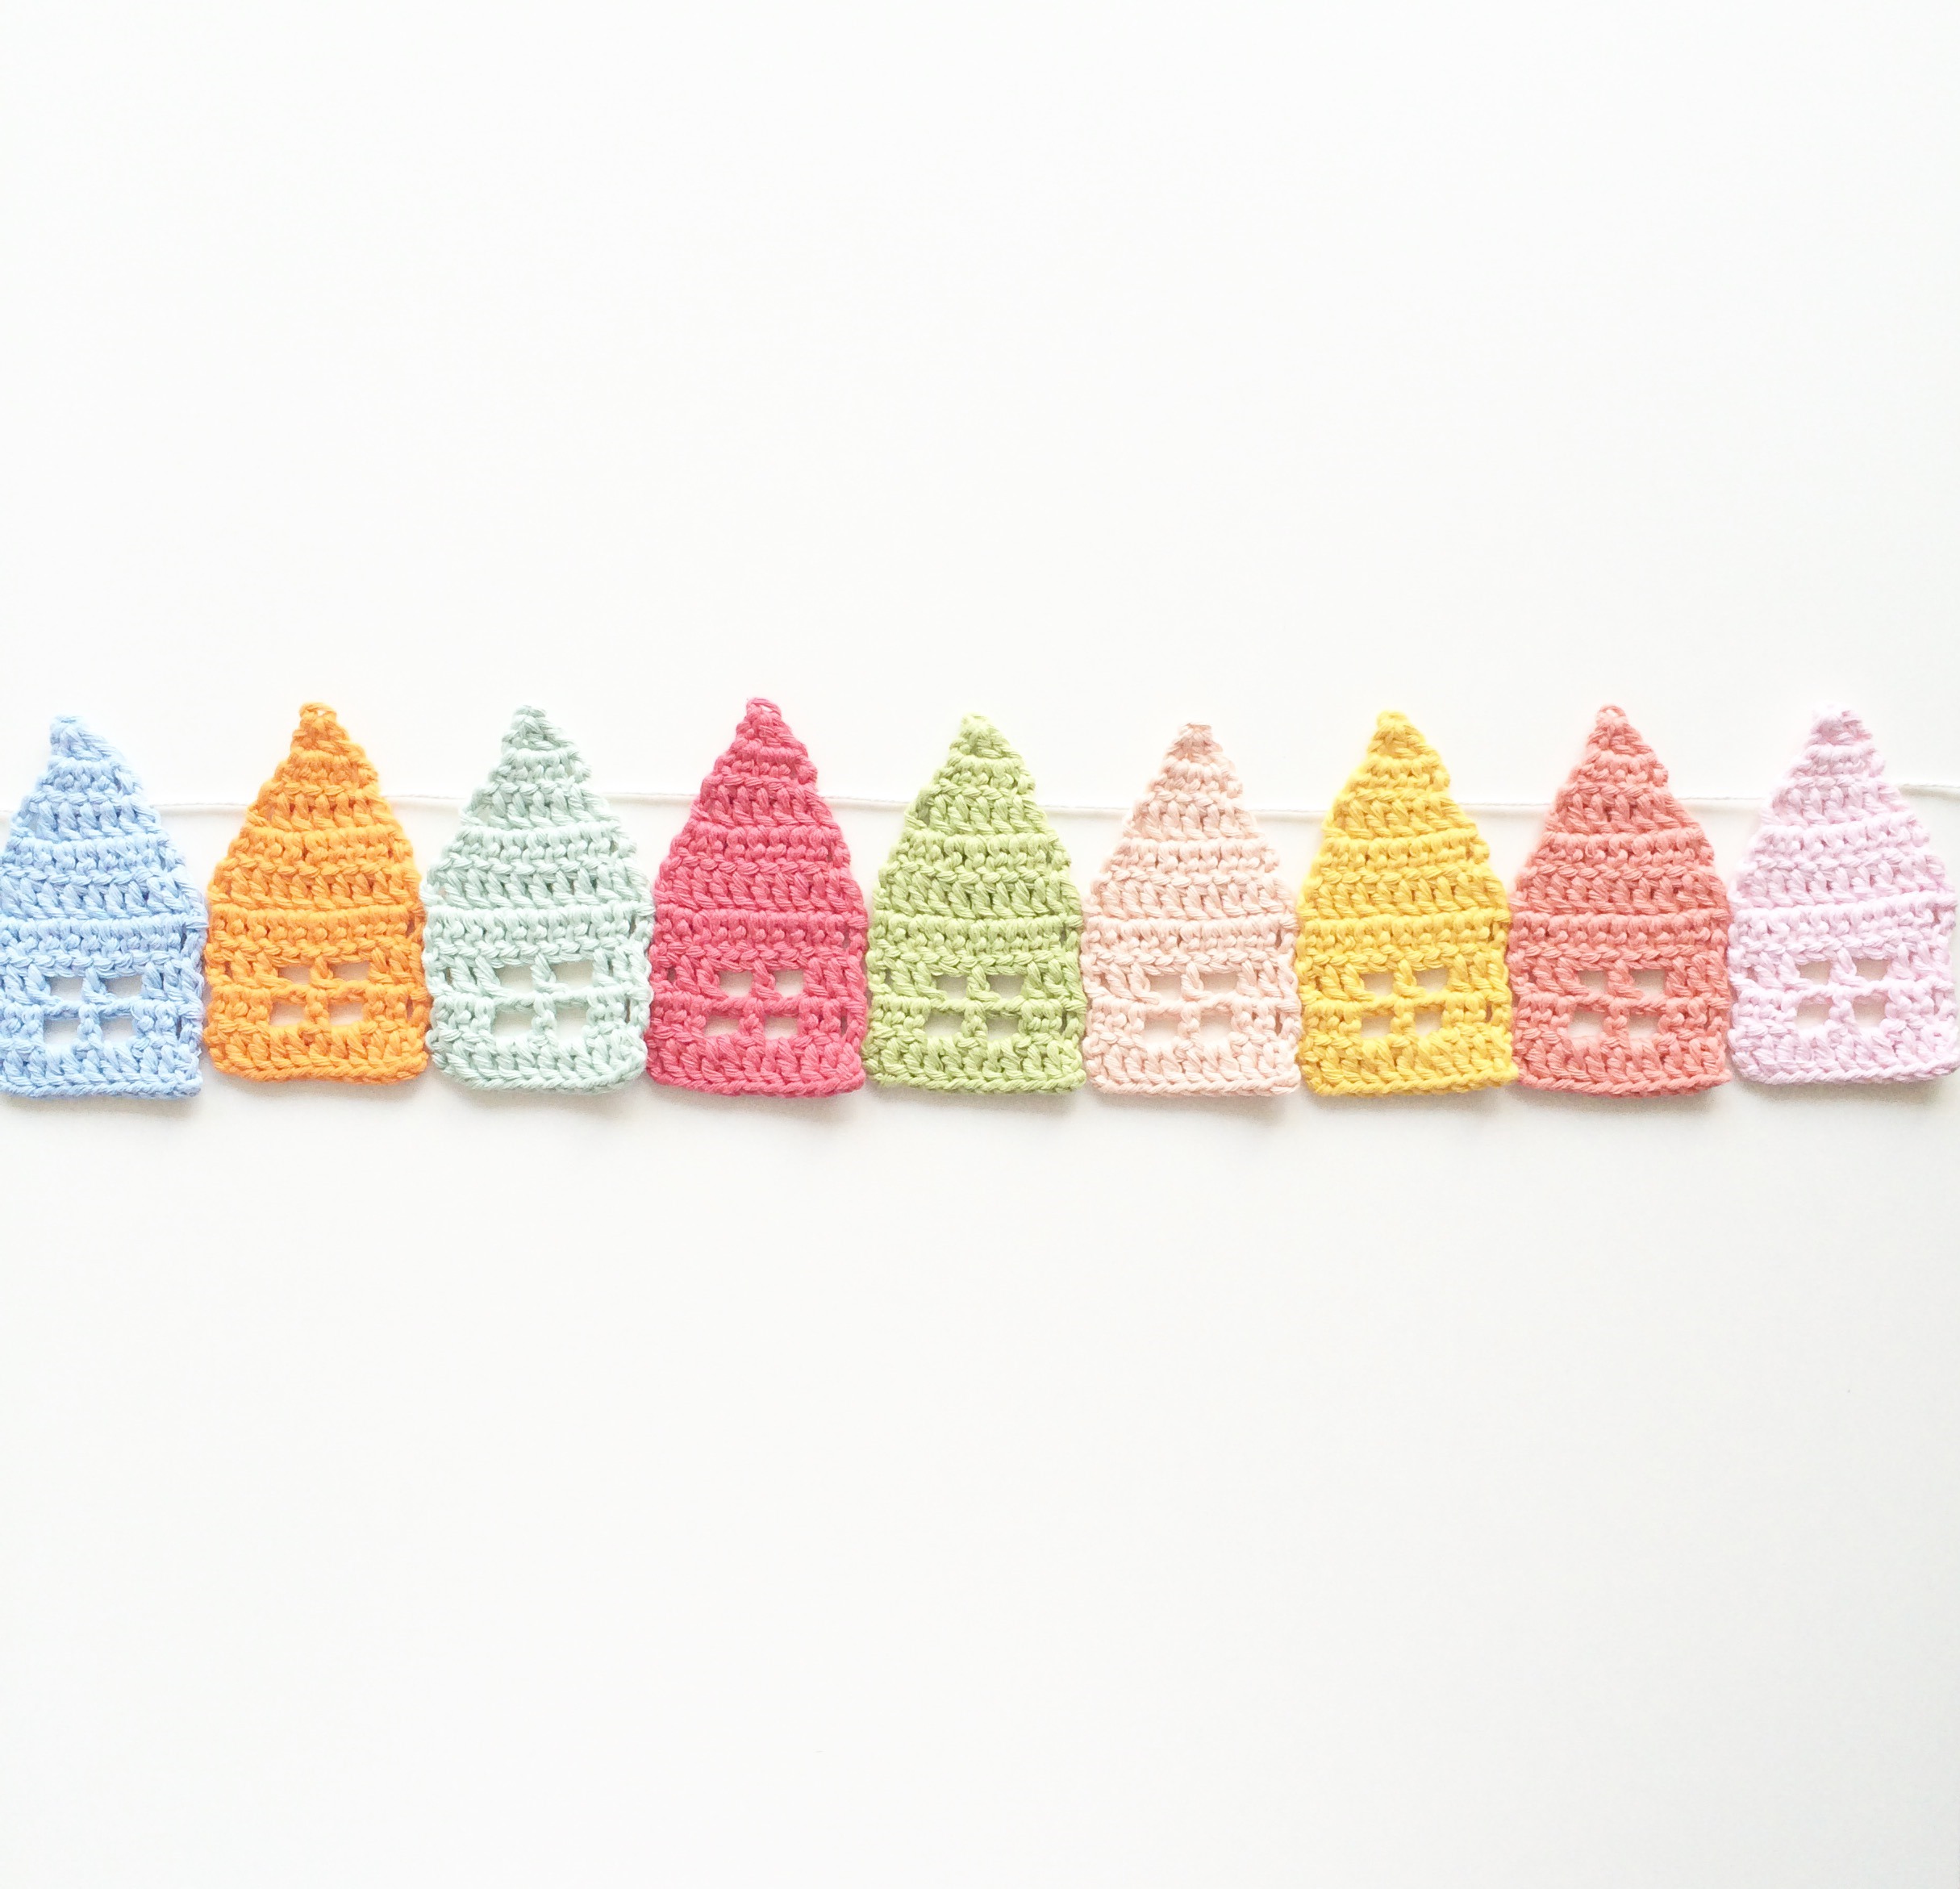
Colourful Little Crochet Houses
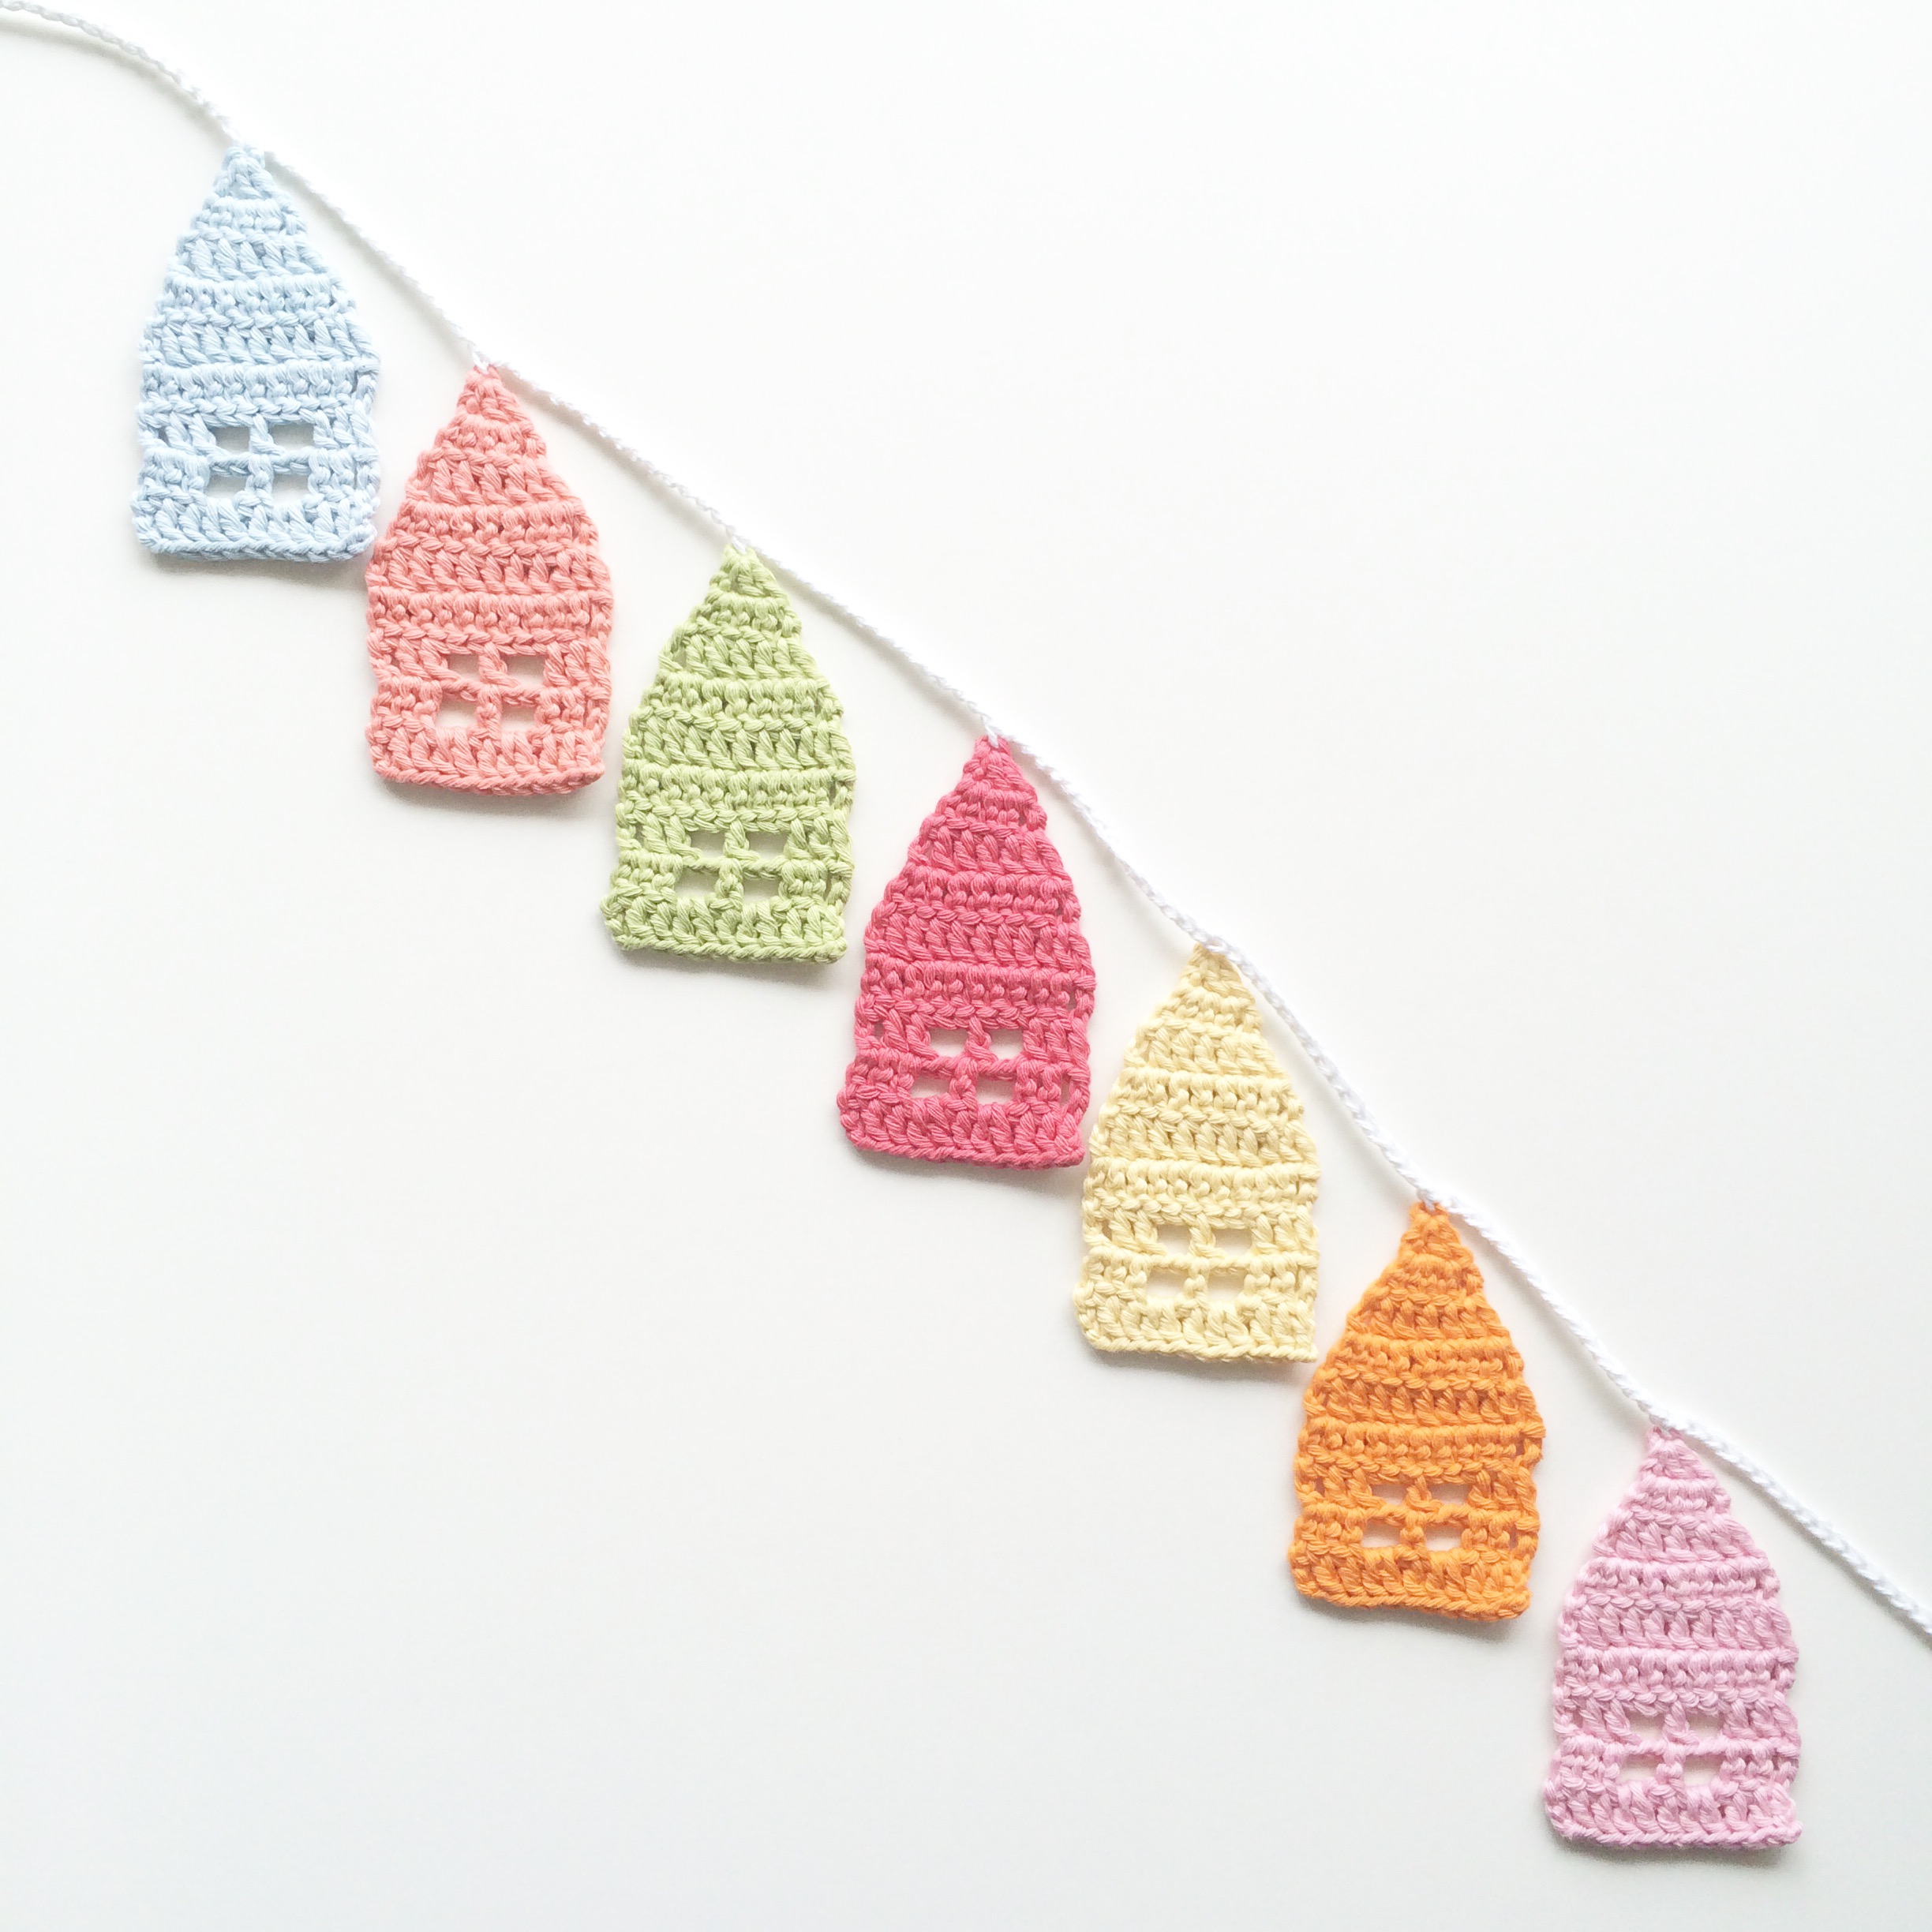
Little Crochet Houses bunting

Little crochet houses bunting
You can turn these into a bunting or a garland. They can be used as an appliqué or as Christmas tree decorations. The possibilities are endless and I’m sure all you amazing crafter’s will find brilliant and unique ways to use this pattern. If you share your makes on Instagram / Facebook / Pinterest then do tag me or use #littlecrochethouses or #knitpurlhook so we can all get inspired by your lovely creations.
Have a great day. And thank you for stopping by.
Love,
Aki.

Super ! J’adore ces maisonnettes. Merci pour le tuto.
LikeLike
Merci beaucoup pour vos mots merveilleux ! 🙂
LikeLike
Gorgeous! They look like the perfect quick make for my lazy craft day today!!
LikeLike
Thank you! They really are super quick to make!
LikeLike
Wouldn.t they make cute housewarming cards, or “from our house to your house” greeting cards? Thank you.
LikeLike
Oh thats a brilliant idea Sue! Thank you so much for stopping by!
LikeLike
Love them!!!
LikeLike
Thank you 😀
LikeLike
Just adorable and so addictive I have been making them all afternoon – thank you for your amazing pattern xxx
LikeLike
Thank you so much Sue 🙂 They really are addictive!
LikeLike
So pretty thank you for sharing X
LikeLike
Thank you Ela 🙂
LikeLike
J’adore ! C’est très mignon 🙂
LikeLike
Merci beaucoup! 🙂
LikeLike
Love your pretty houses!!
LikeLike
Thank you Elisabeth! You’re always so encouraging. 🙂
LikeLike
I was looking for an original way to tell friends and family that I moved and this is perfect. Thanks so much for sharing. I will be making a bunch of those to use on a card.😊 The possibilitiesare just endless. I can already see a bunch of projects. Will share them on Instagram when I am done and make sure I give you the credit.
LikeLike
Thank you so much. Such a brilliant idea! so looking forward to seeing the cards! I love how creative everyone is being with these little houses! Have a great weeked! 🙂
LikeLike
These little housen are so chute. I love THE bunting!
LikeLike
Thank you so much Daphne 🙂
LikeLike
Thanks for sharing! Original & cute! I cant wait to try them out!
LikeLike
Thank you so much. I’m so glad you liked them! 🙂
LikeLike
Pingback: Little Crochet Houses Pattern & Tutorial | adornosmalulu
Reblogged this on adornosmalulu.
LikeLike
Thank you for reblogging it 🙂
LikeLiked by 1 person
These little houses are lovely, thank you so much for the tutorial. I will keep it on Pinterest, if I may? Of course I will mention your blog
LikeLike
Absolutely go for it! Thank you. 🙂
LikeLike
Fantastic. Going to make these as new address cards for when we move abroad soon. Thanks for the lovely idea.
LikeLike
Oh that’s a fabulous idea! Good luck with the move. And thanks for stopping by. 🙂
LikeLike
Hi, super cute and fun! I made my sister one to celebrate her new home: http://hipmethaken.blogspot.nl/2015/12/happy-home-slinger.html
LikeLike
Thank you so much for sharing the beautiful bunting. I loved everything in your blogpost. 🙂
LikeLike
JUST LOVE the little houses. Thank you, mw
LikeLike
Pingback: Craft project ideas for a winter crafternoon - Mollie Makes
This is what I am thinking. You can make them into crayons ( in long strips) then sew together to make a baby or a toddler blanket! Instead of making the windows, continue on in a solid pattern and continue to increase to 15-17-20 stitches. Continue down a few more rows then change to black. Do a few inches in black then back to the original color. What do you think?
LikeLike
I adore your houses! you are great! thank you so much for the tutorial! can’t wait to “fix” my roof…for now it looks like a bow. 😦
LikeLike
Thank you for sharing the pattern. I also loved the original picture on Pinterest but couldn’t find a pattern for them. It looked like they were made from the bottom to the roof. I like your idea of beginning with the roof first. I made a bunting using your pattern. It’s absolutely adorable! The pattern is well written and crochets up quick.
LikeLike
Reblogged this on Make Bake Grow and commented:
This Cute little pattern is from the very talented Aki @knitpurlhook
I am definitely going to try this one.
LikeLike
Thankyou for sharing your pattern Aki, I have reblogged it to my blog as I want to inspire myself and others with new ideas, as my son is moving to a new house soon I think I will make a little garland of some of these.
LikeLike
Pingback: Quick and Easy Crochet Applique Patterns - Pattern Center
Im so excited to make these. They are going to be given for Christmas along with a small jar of lemon curd and a loaf of gingerbread.
LikeLiked by 1 person